How to generate Shopify API credentials for Mergado (from January 1, 2026)
 IMPORTANT instructions for connecting
In the
URLs > App URLfield
enter:https://app.mergado.com/
You must enter this URL address in the App URL field when creating a custom app in Shopify.
Minimum permissions (scopes) that Mergado requires.
write_products,read_products,write_markets,read_markets,read_metaobjects
Permissions (scopes) if you also want to use Mergado Marketplaces
read_customers,write_customers,write_orders,read_orders,read_products,read_shipping,write_shipping,write_order_edits,read_order_edits
This tutorial strictly follows the official Shopify documentation and UI for creating apps using the Shopify Developer Dashboard.
Official resources:
https://shopify.dev/docs/apps/build/dev-dashboard/create-apps-using-dev-dashboard
Who is this guide for?
This article is intended for:
- Shopify merchants connecting their store to Mergado
- Agencies or developers setting up Shopify integrations for clients
- Anyone who needs to generate a Shopify API access token
You are creating a custom, API-only app for a single store. You do not need to publish a public app.
What you will need
- A Shopify account with admin access to the store
- Access to the Shopify Developer Dashboard
Before you start: Check your Markets settings
Before creating the app, make sure your Markets are correctly configured in the Shopify admin.
What must be configured
For each Market from which you want to import products into Mergado, the following must be set:
- a domain
- a language
- both must be explicitly added to the Customized section
It is not sufficient for the domain and language to exist only as Inherited or be set as Primary .
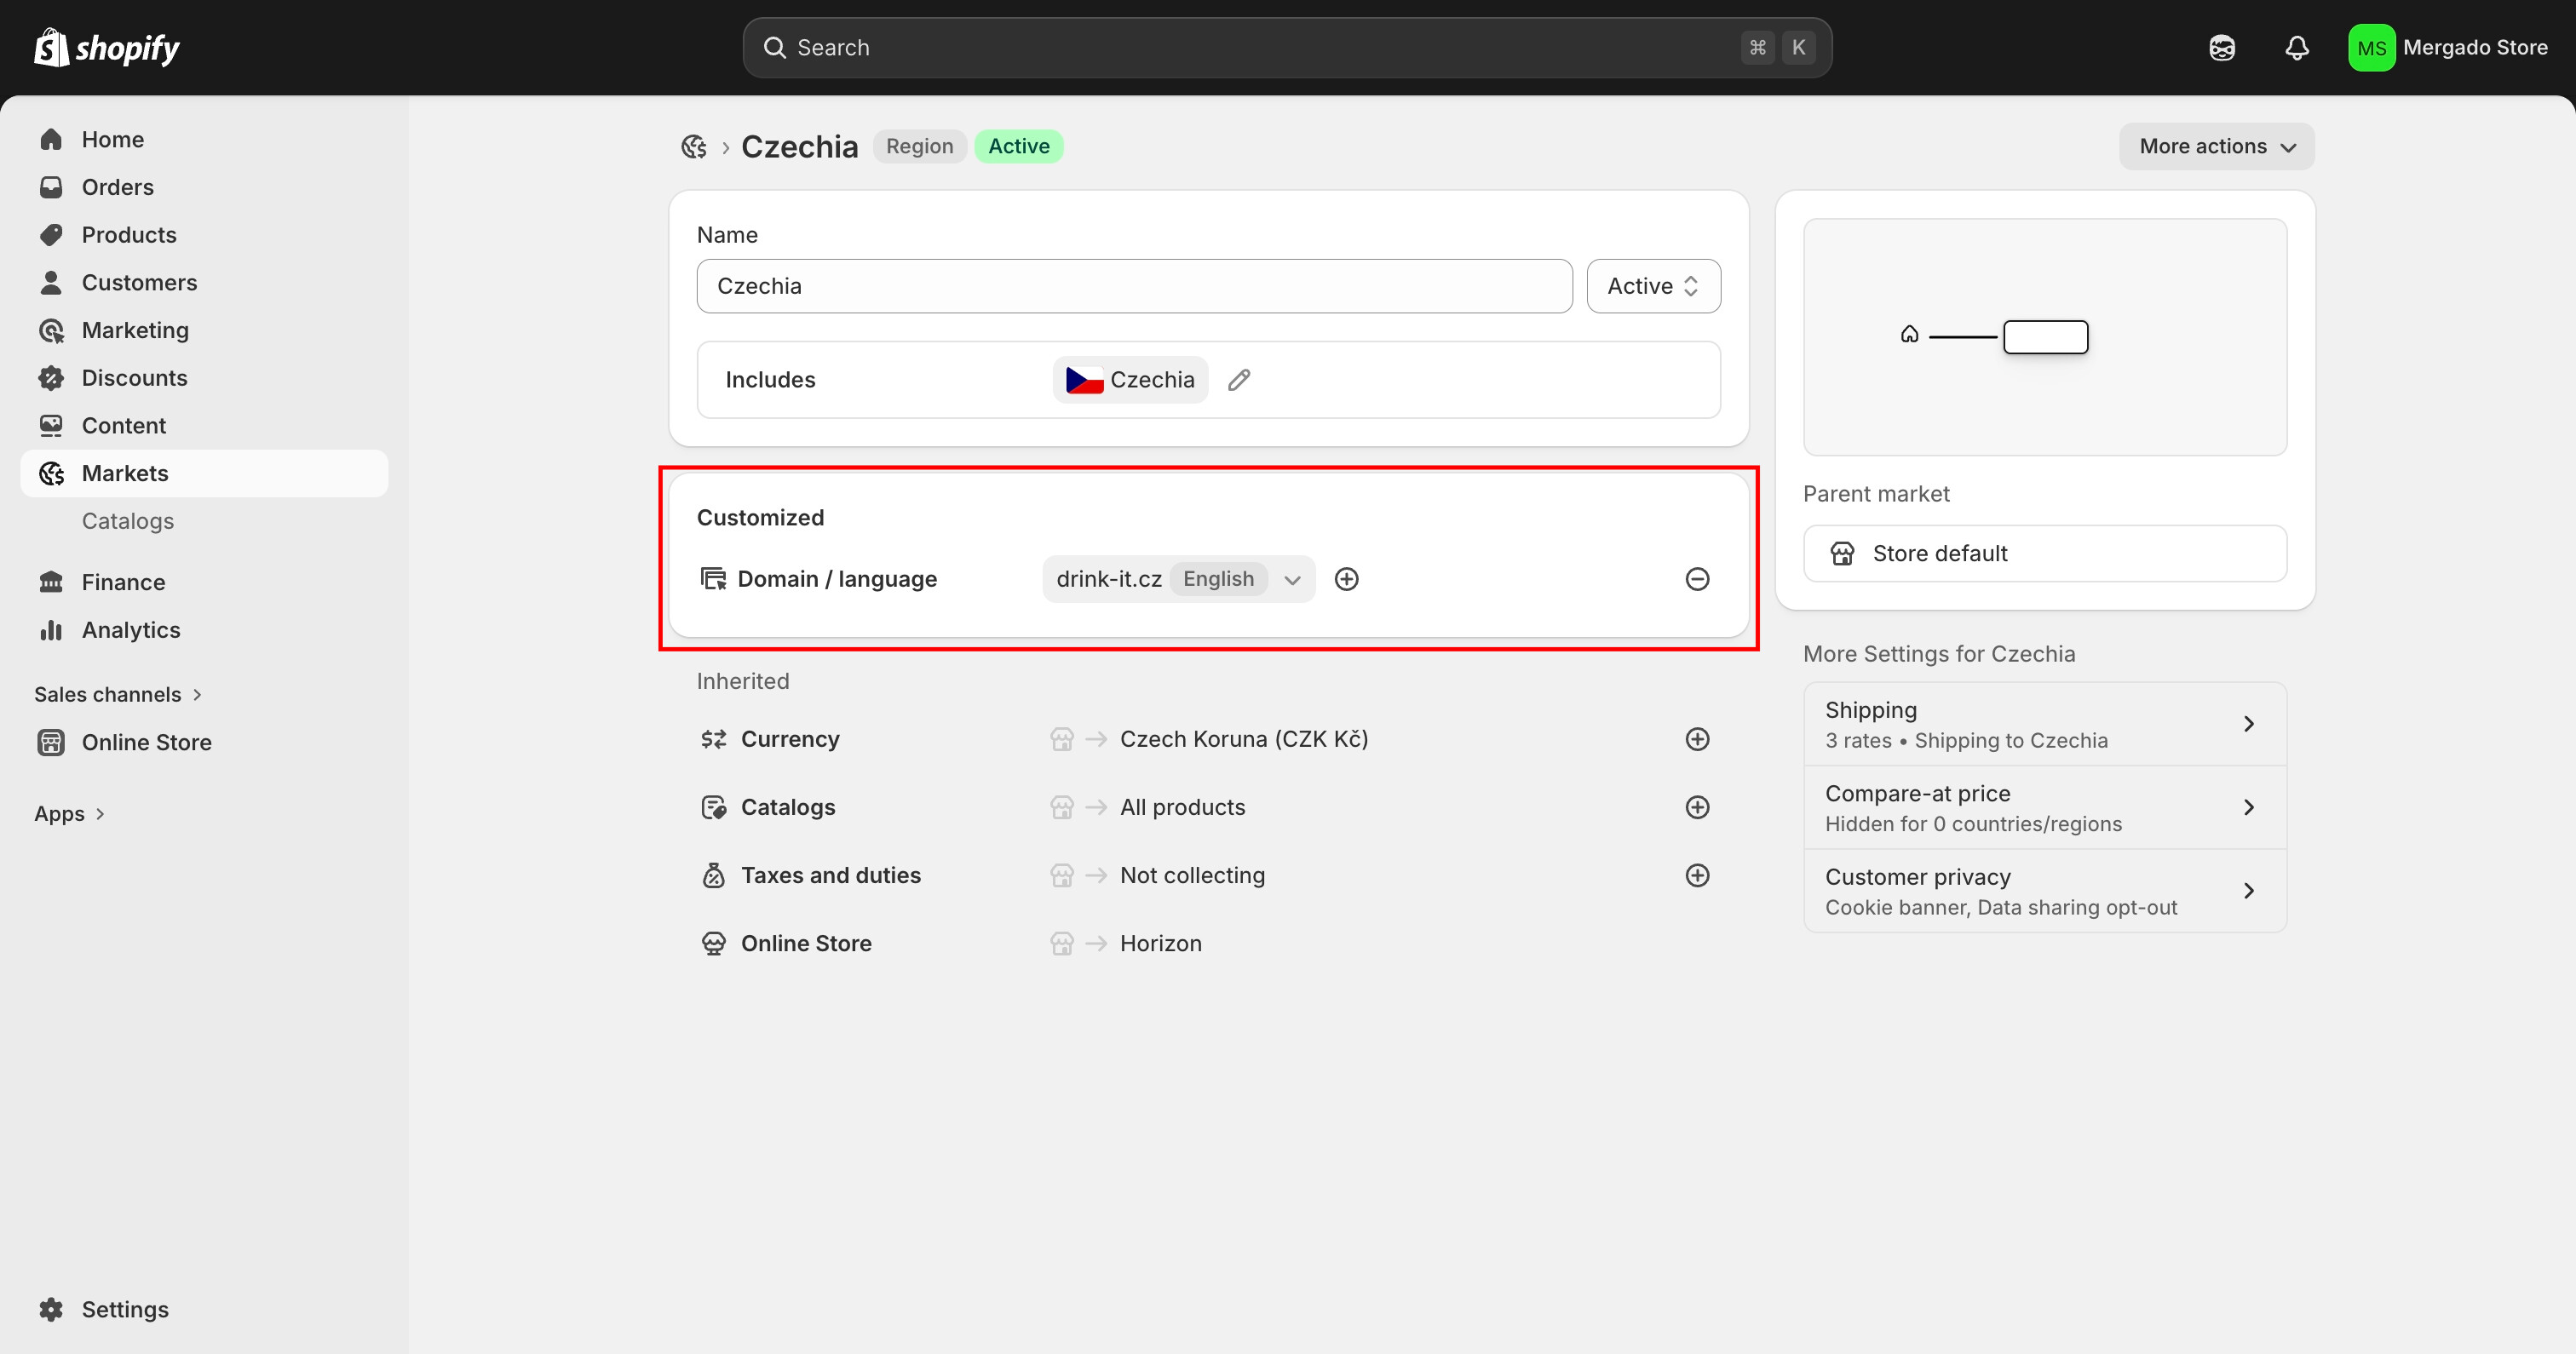
Steps in the Shopify admin
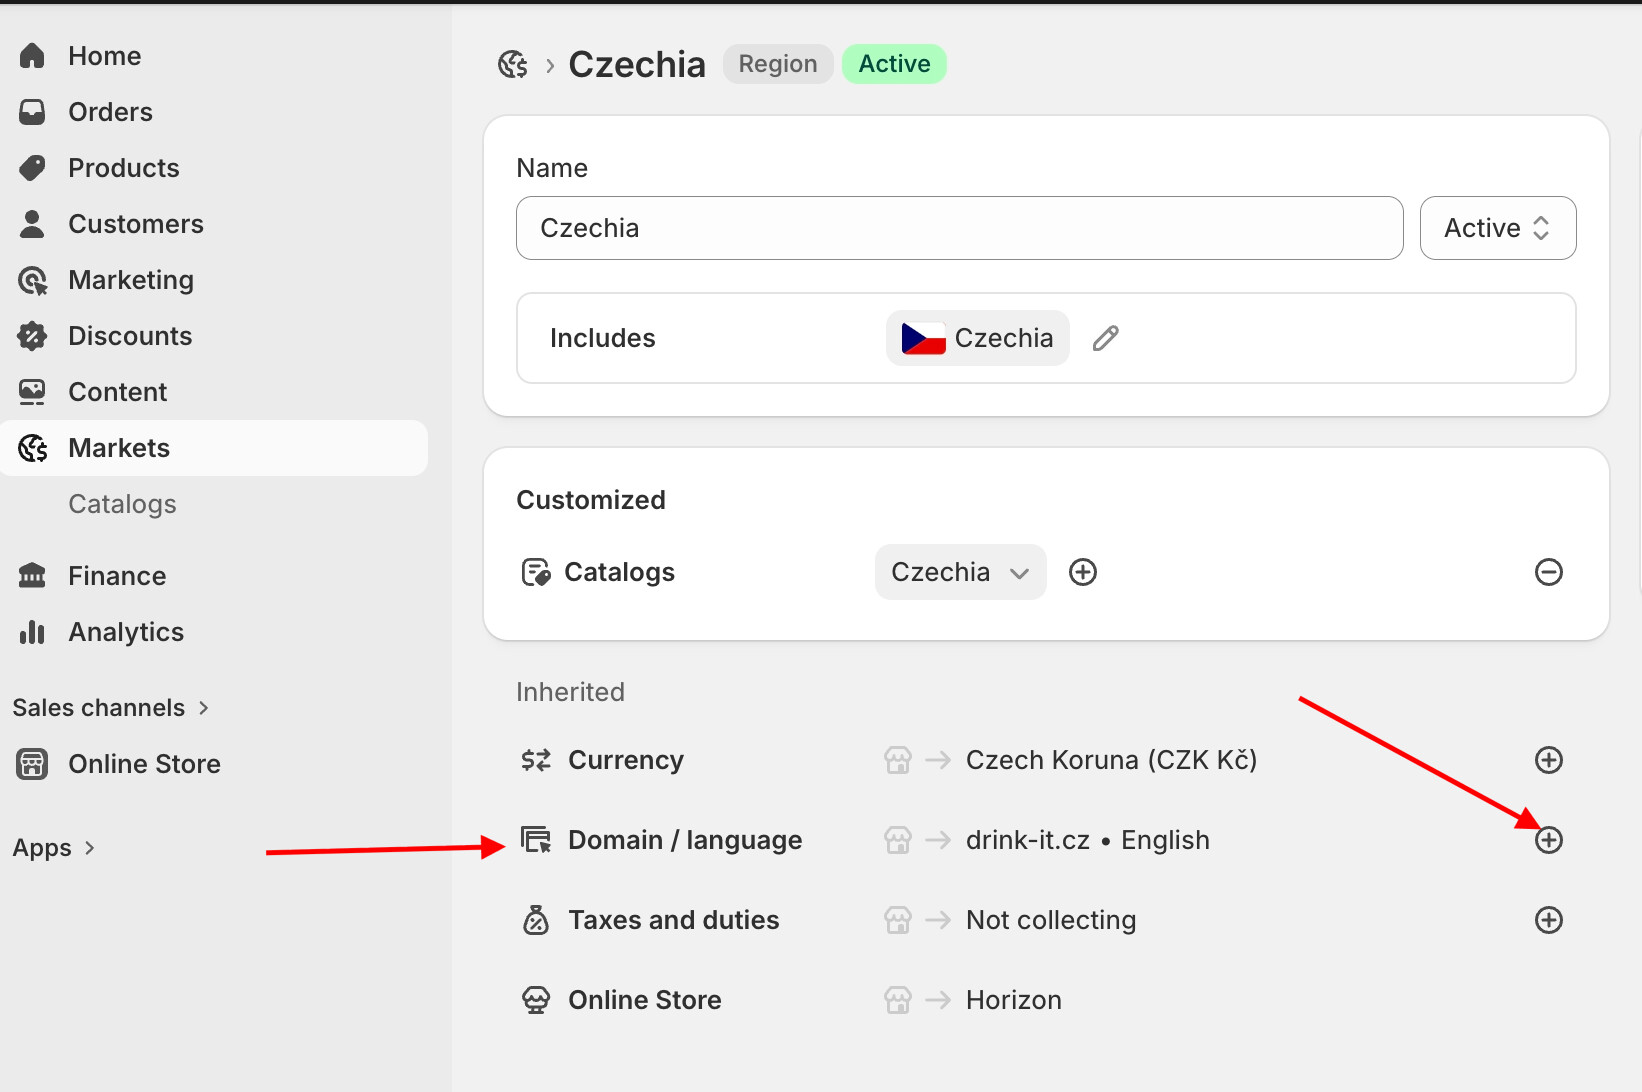
- Open the Shopify admin
- In the main left menu, click Markets
- Open the specific market (for example, Czechia )
- Scroll to the Inherited section
- In the Domain / language row, click the + icon
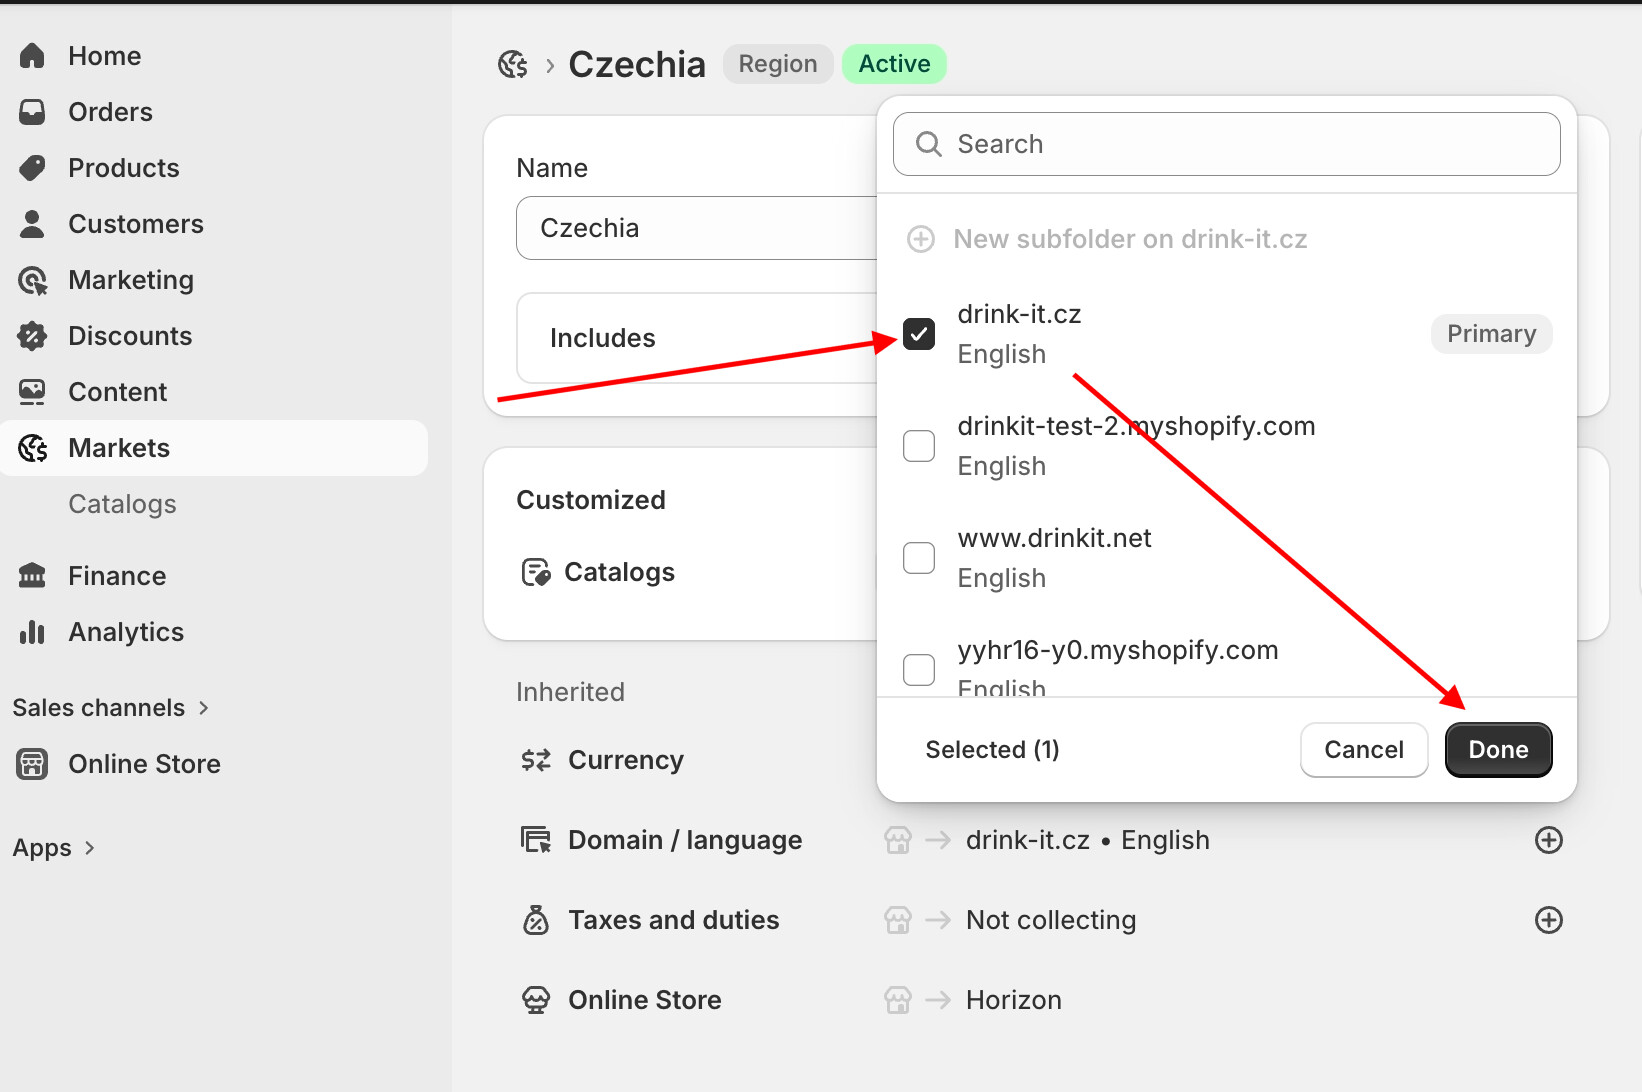
- In the modal window:
- select the required domain
- select the required language
- Click Done
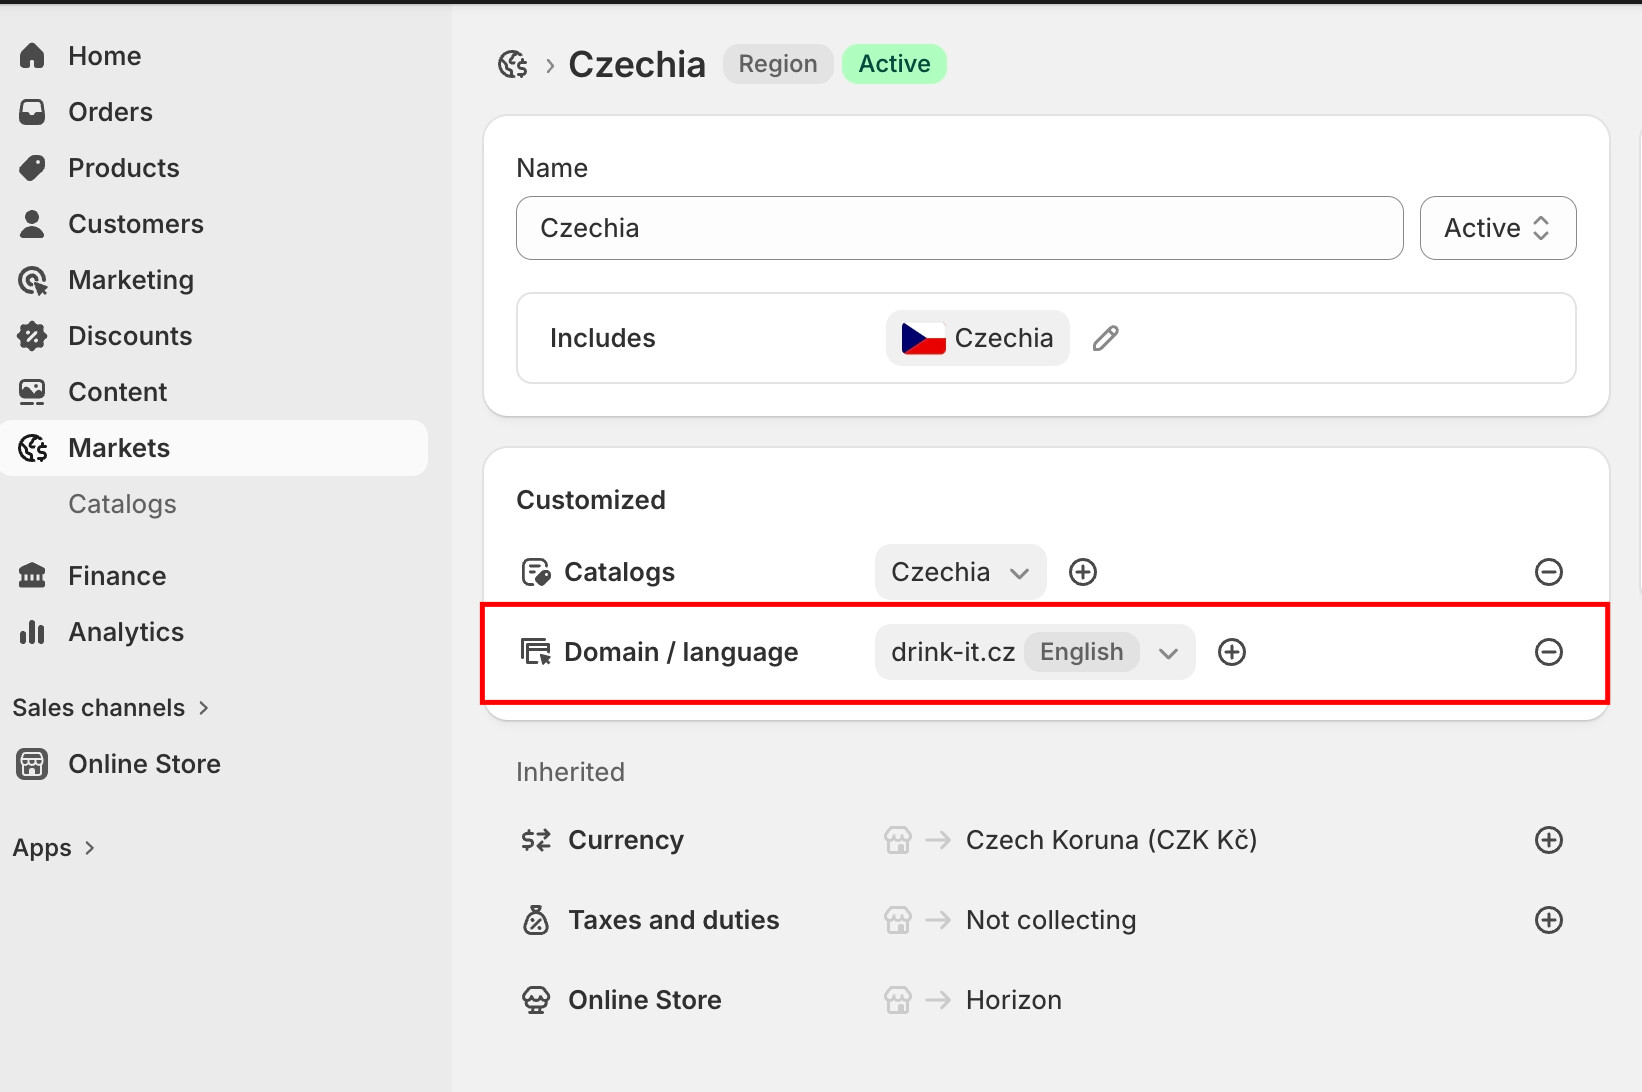
- Verify that Domain / language now appears in the Customized section
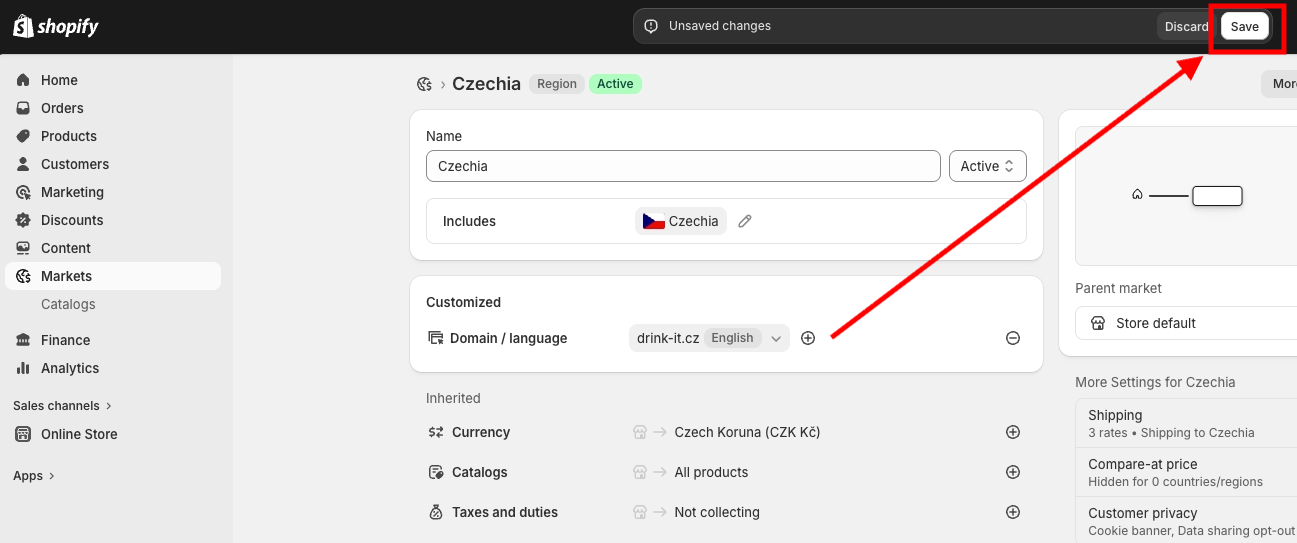
- Click Save to confirm the changes
If Domain / language remain only in the Inherited section, Shopify will not return data for that market via the API and Mergado will not be able to import products.
Step 1: Open the Shopify Developer Dashboard
You can access the Shopify Developer Dashboard in two ways:
Option A: Direct access
- Go to https://dev.shopify.com/
- Log in using your Shopify account
- Open Apps in the left navigation
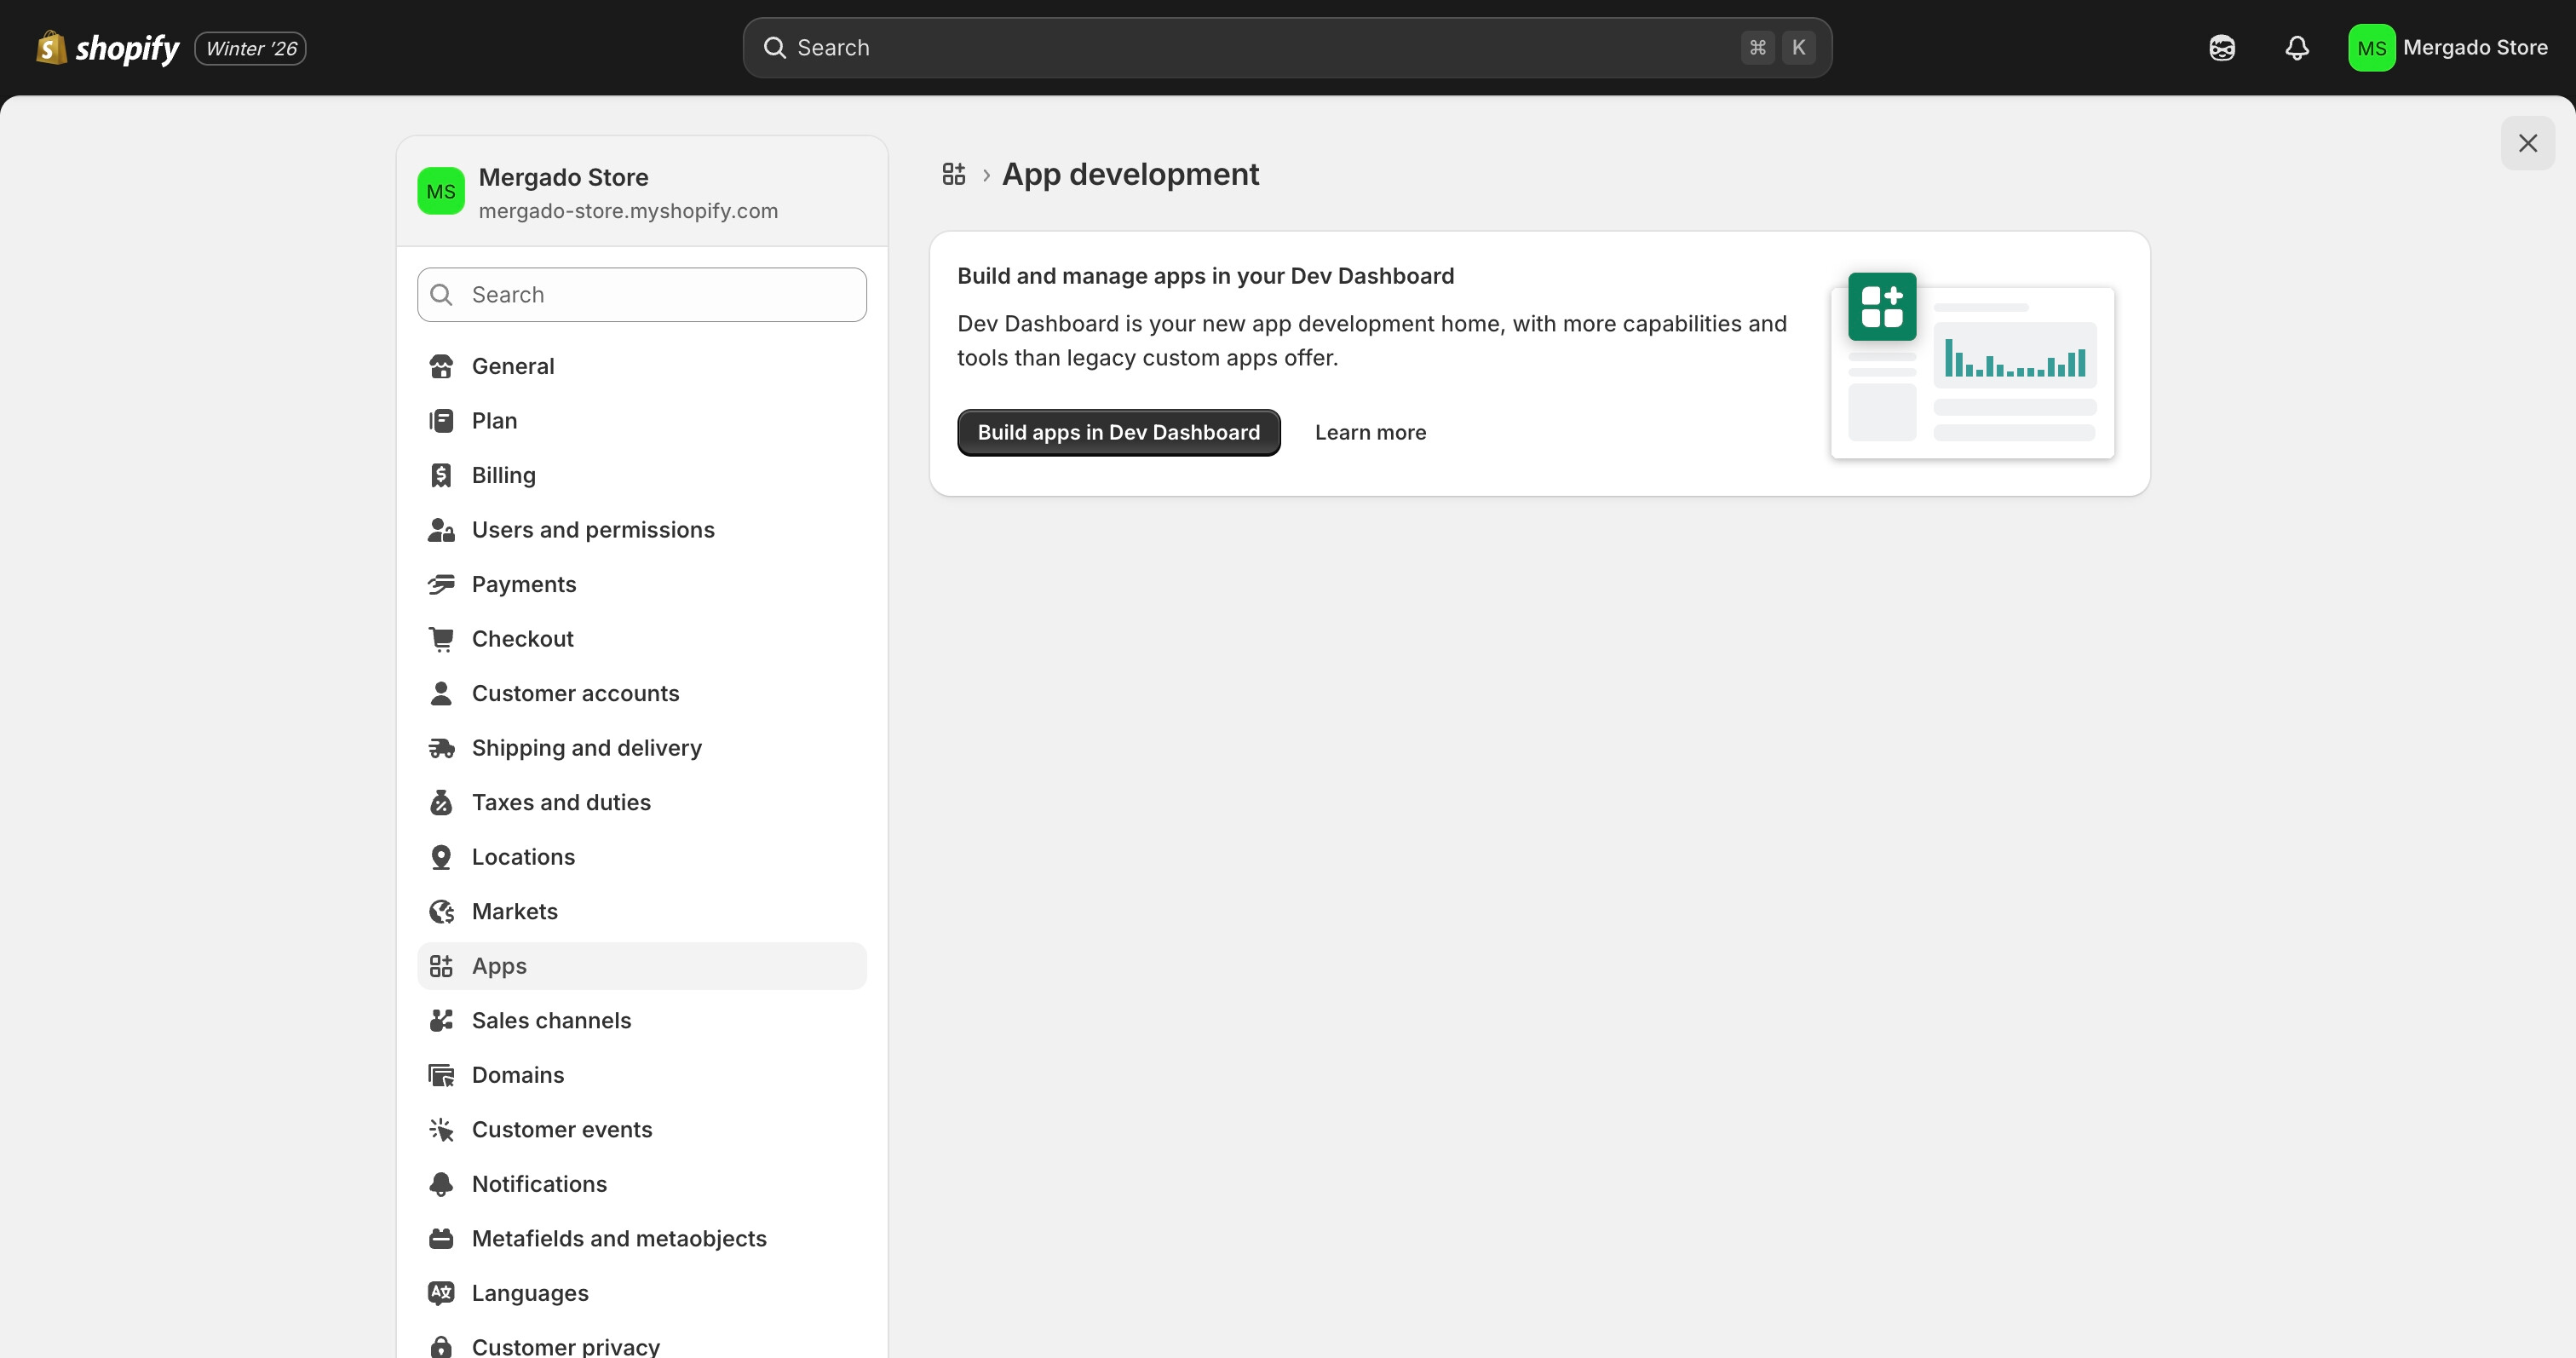
Option B: From the Shopify admin
- Open Shopify admin
- Go to Settings → Apps
- Click Develop apps
- Click Build apps in Dev Dashboard
Step 2: Create a new app
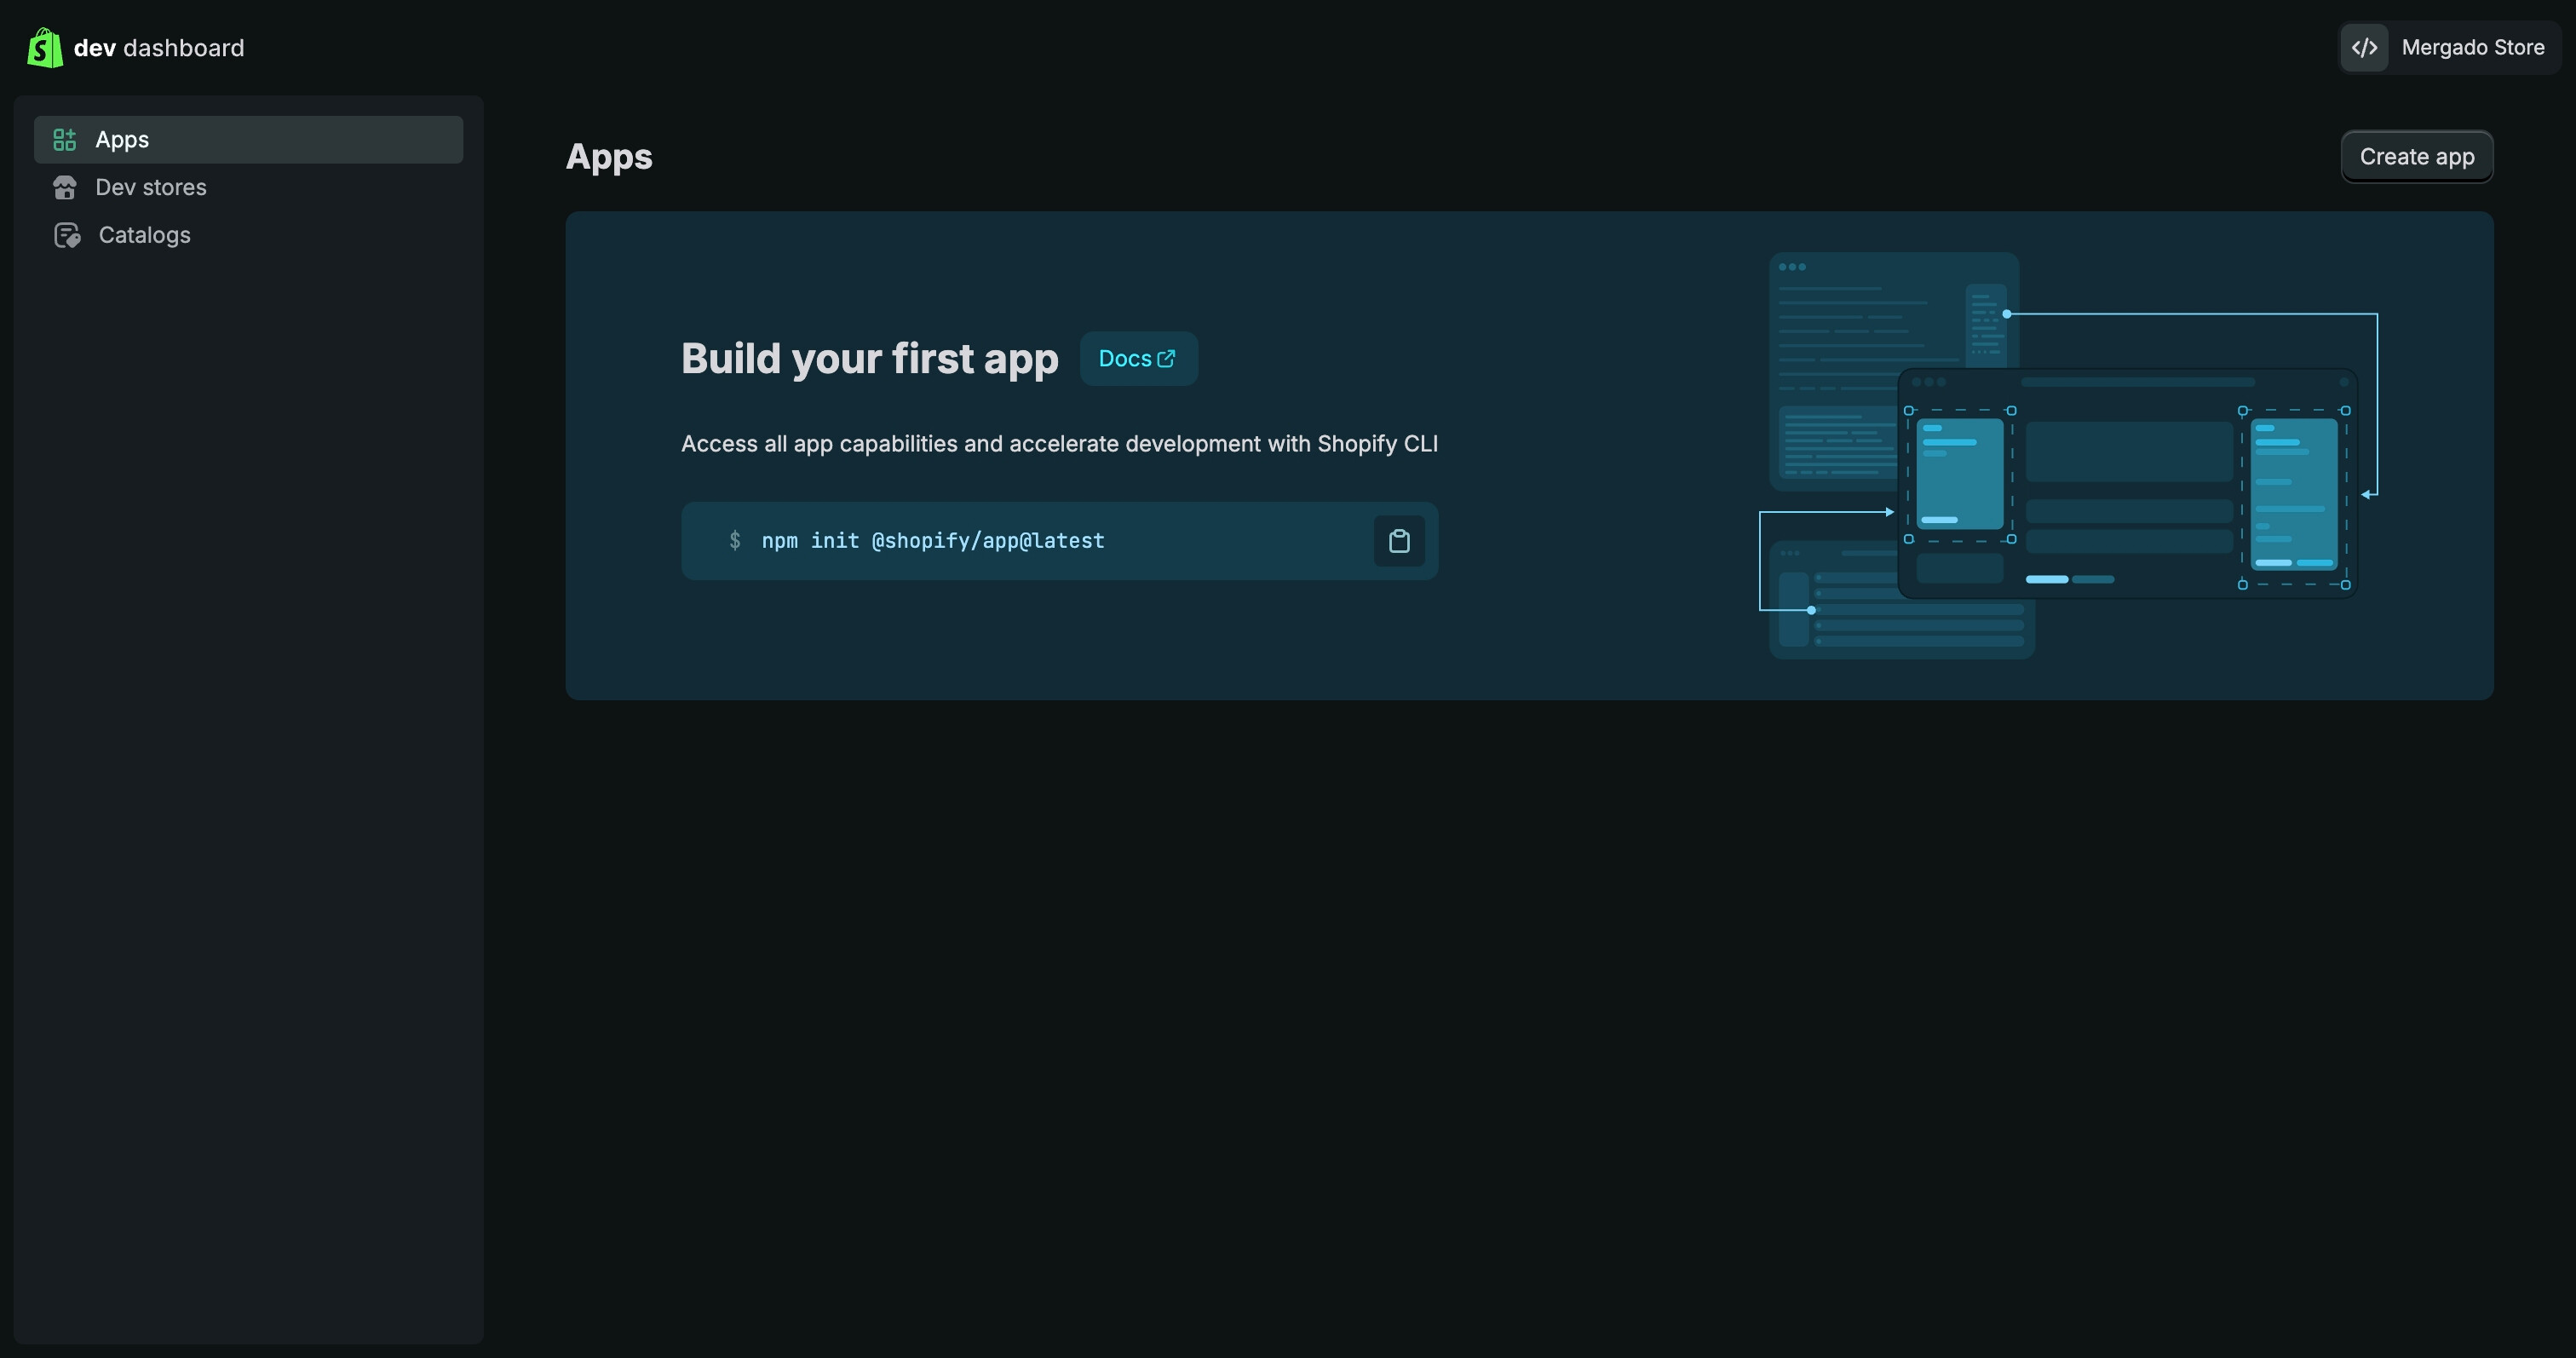
- Go to Apps
- Click Create app (top-right)
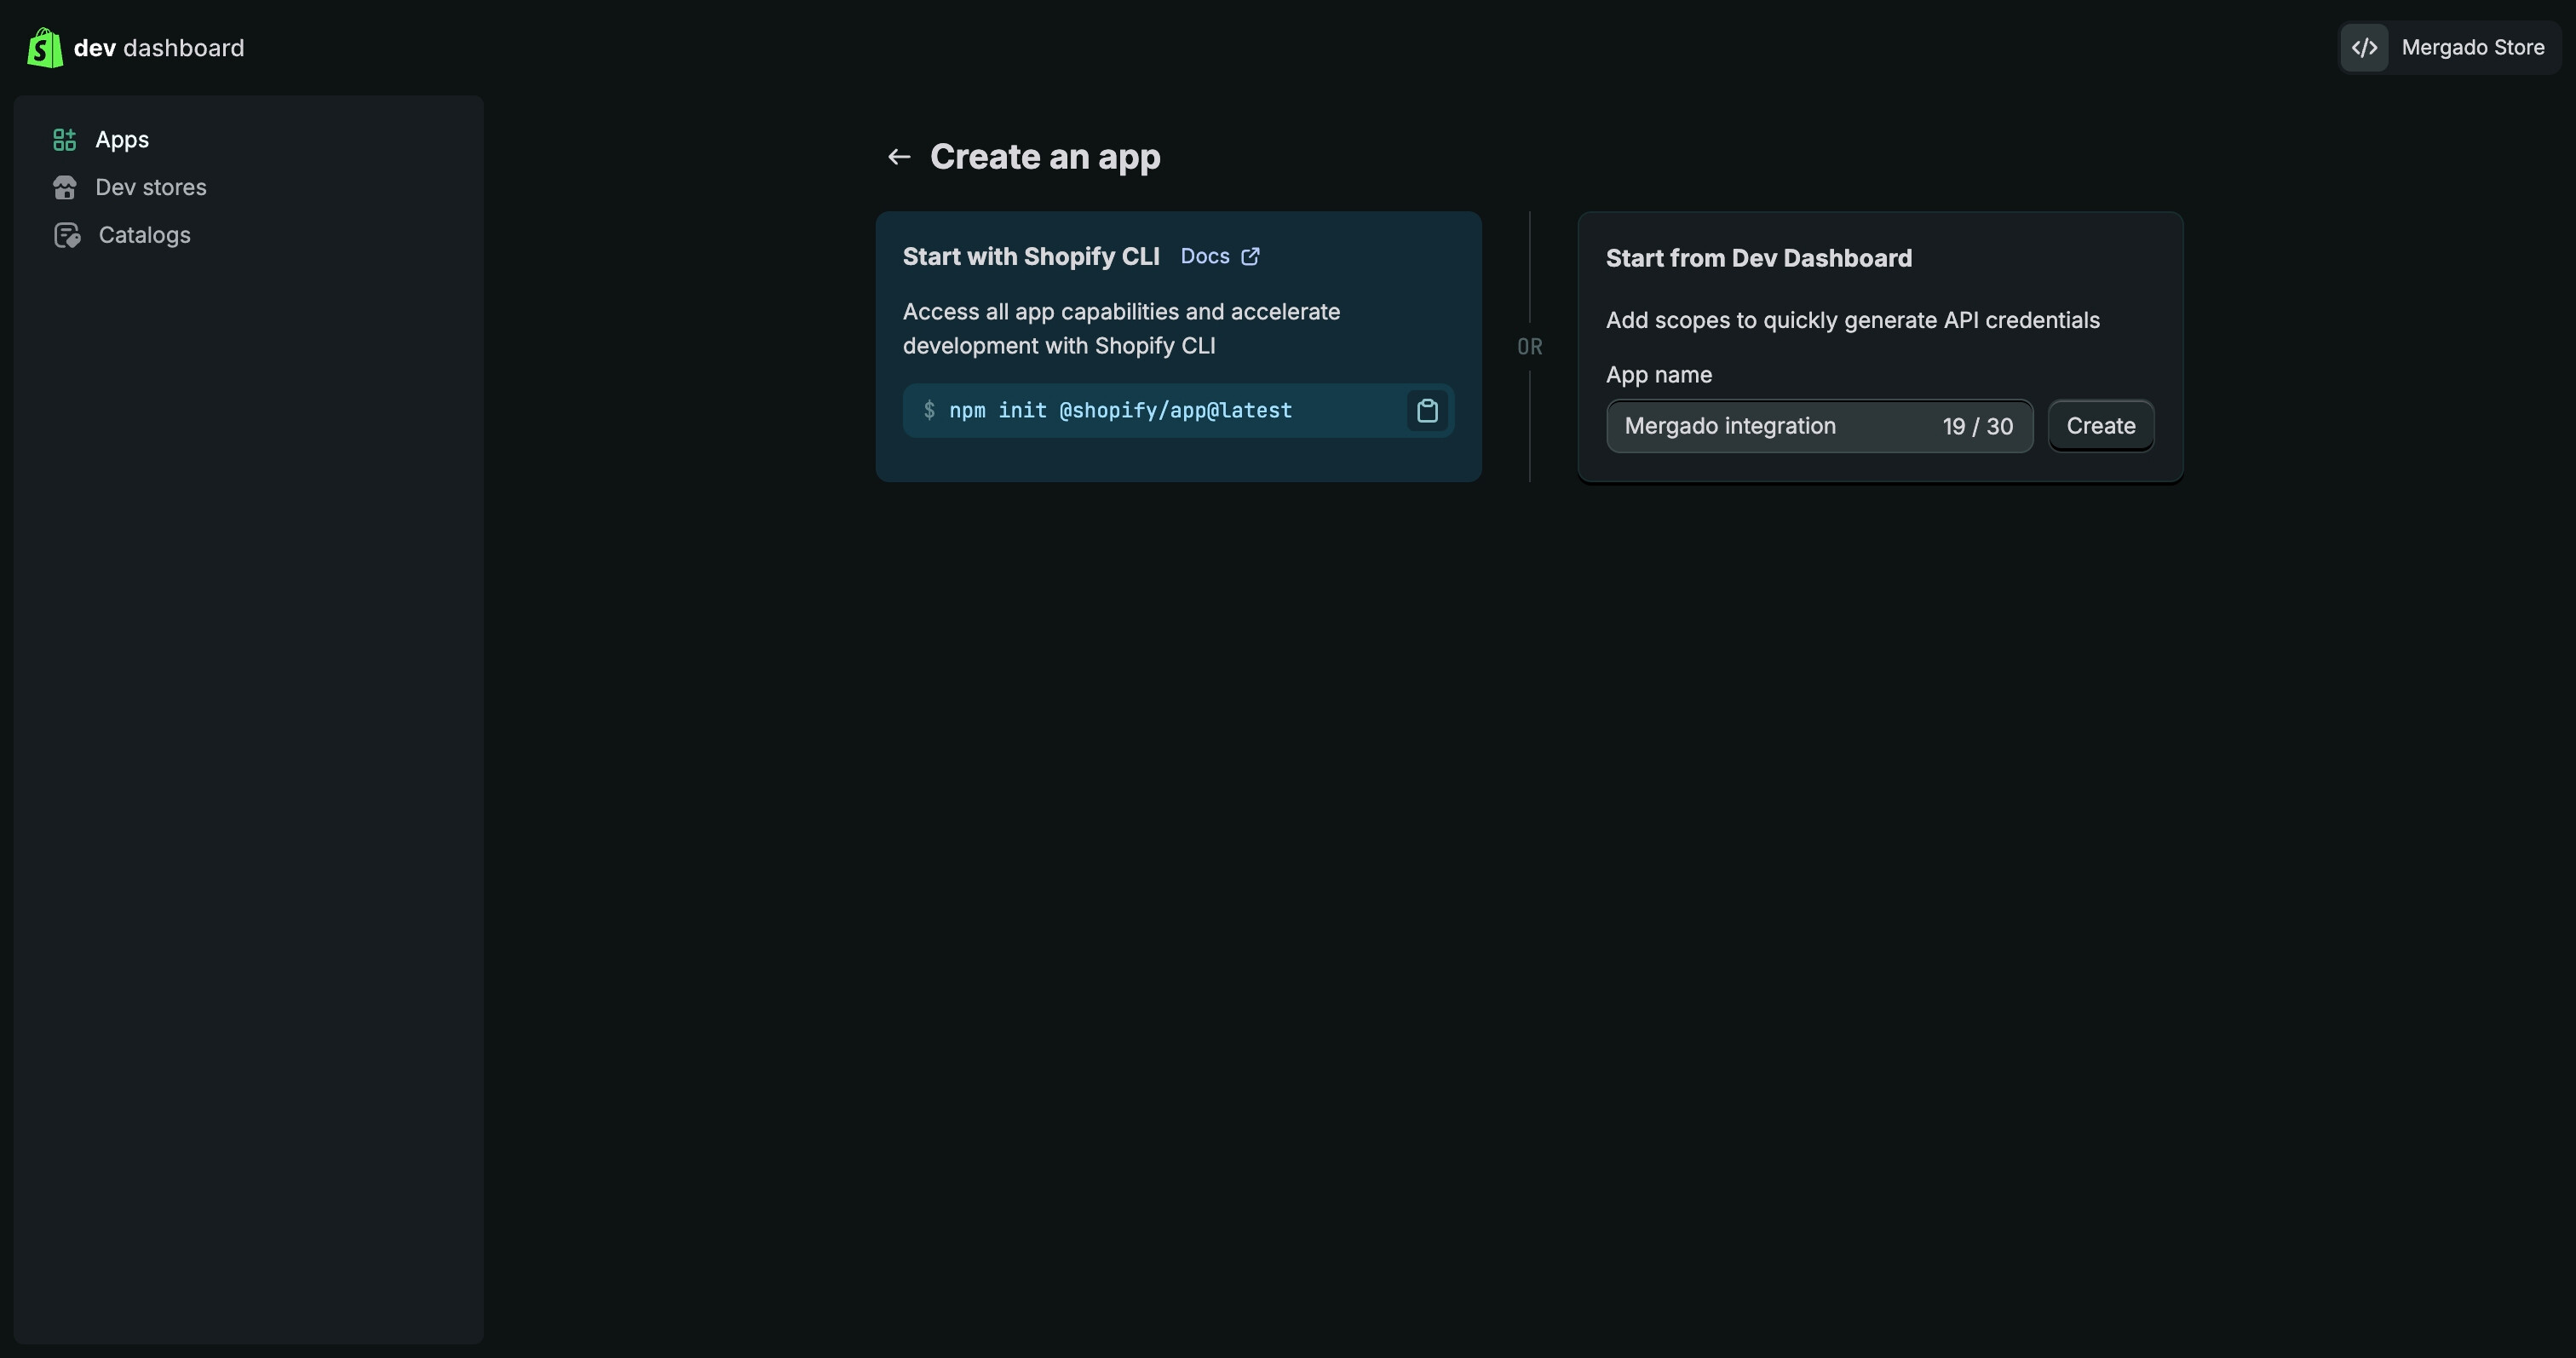
- Select Start from Dev Dashboard
- Name the app (e.g.
Mergado integration) - Click Create
You are redirected to the Versions tab.
Step 3: Create a version and configure scopes
Every app must have at least one version before it can be installed.
You are now on the Versions tab.
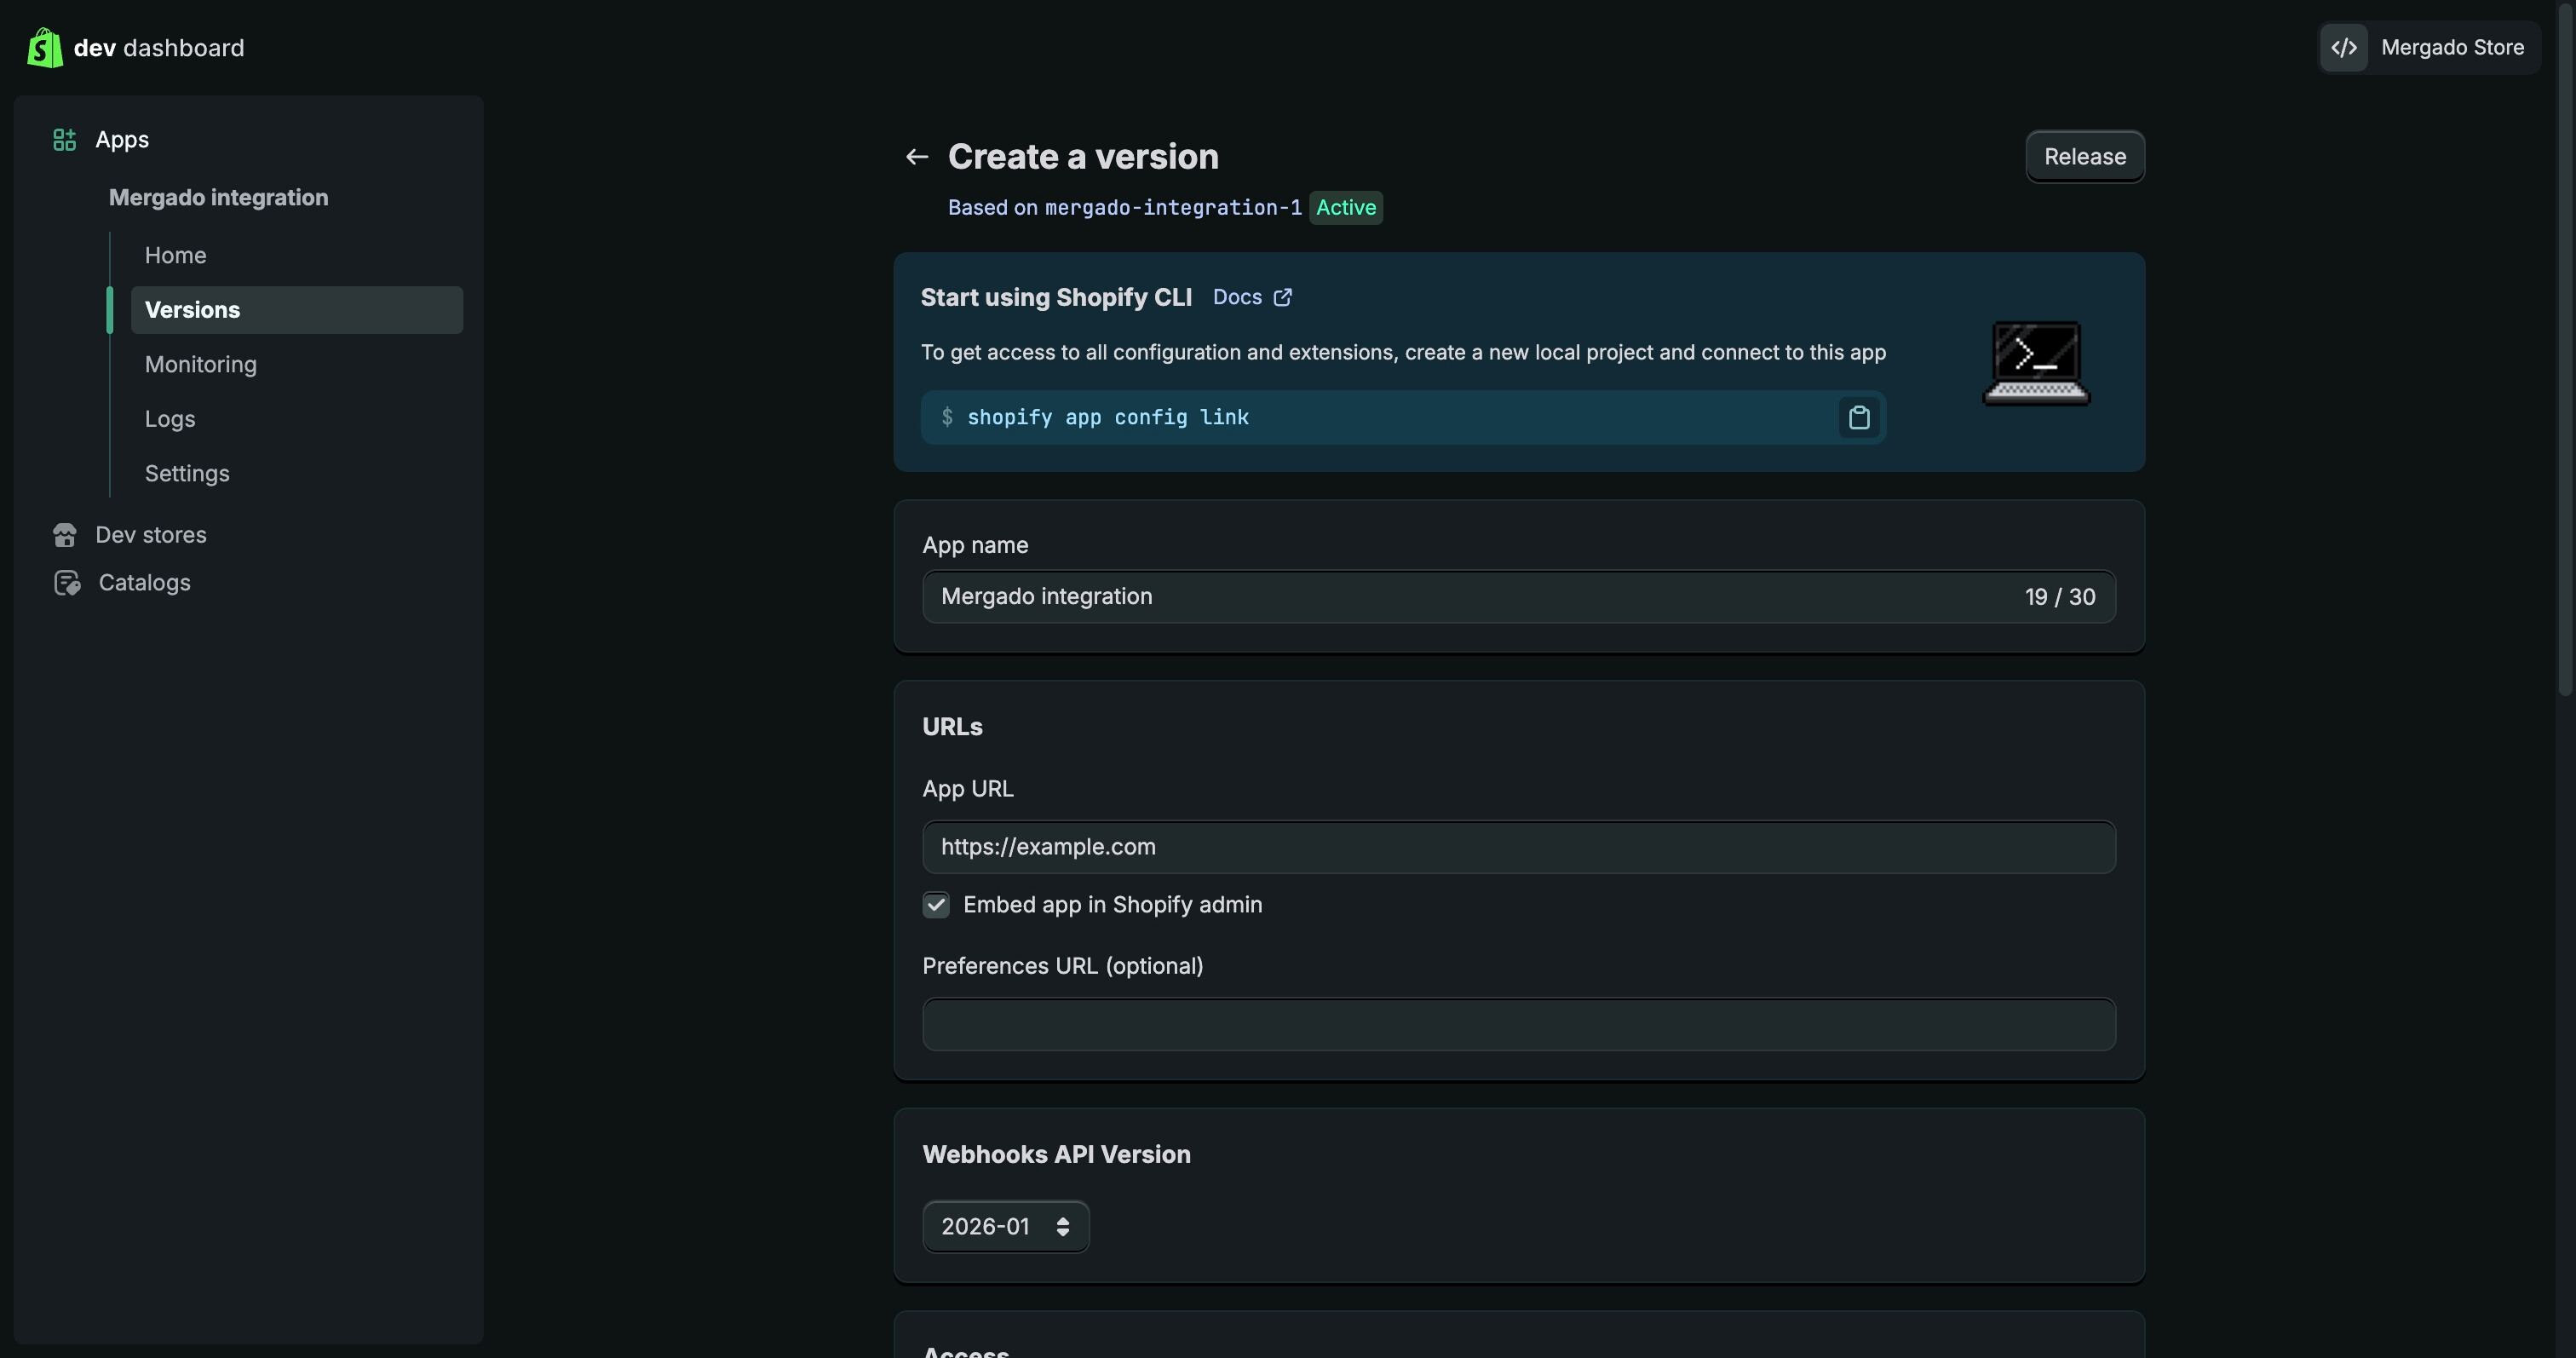
3.1 Configure app URL and embedding

- In the URLs section, locate the App URL field
- Replace the default value
https://example.comwith:
https://app.mergado.com
This step is required for the Shopify–Mergado integration to work correctly . If the default URL is left unchanged, the authorization will fail.
- Directly below the App URL field, uncheck the option Embed app in Shopify admin
3.2 Configure access scopes
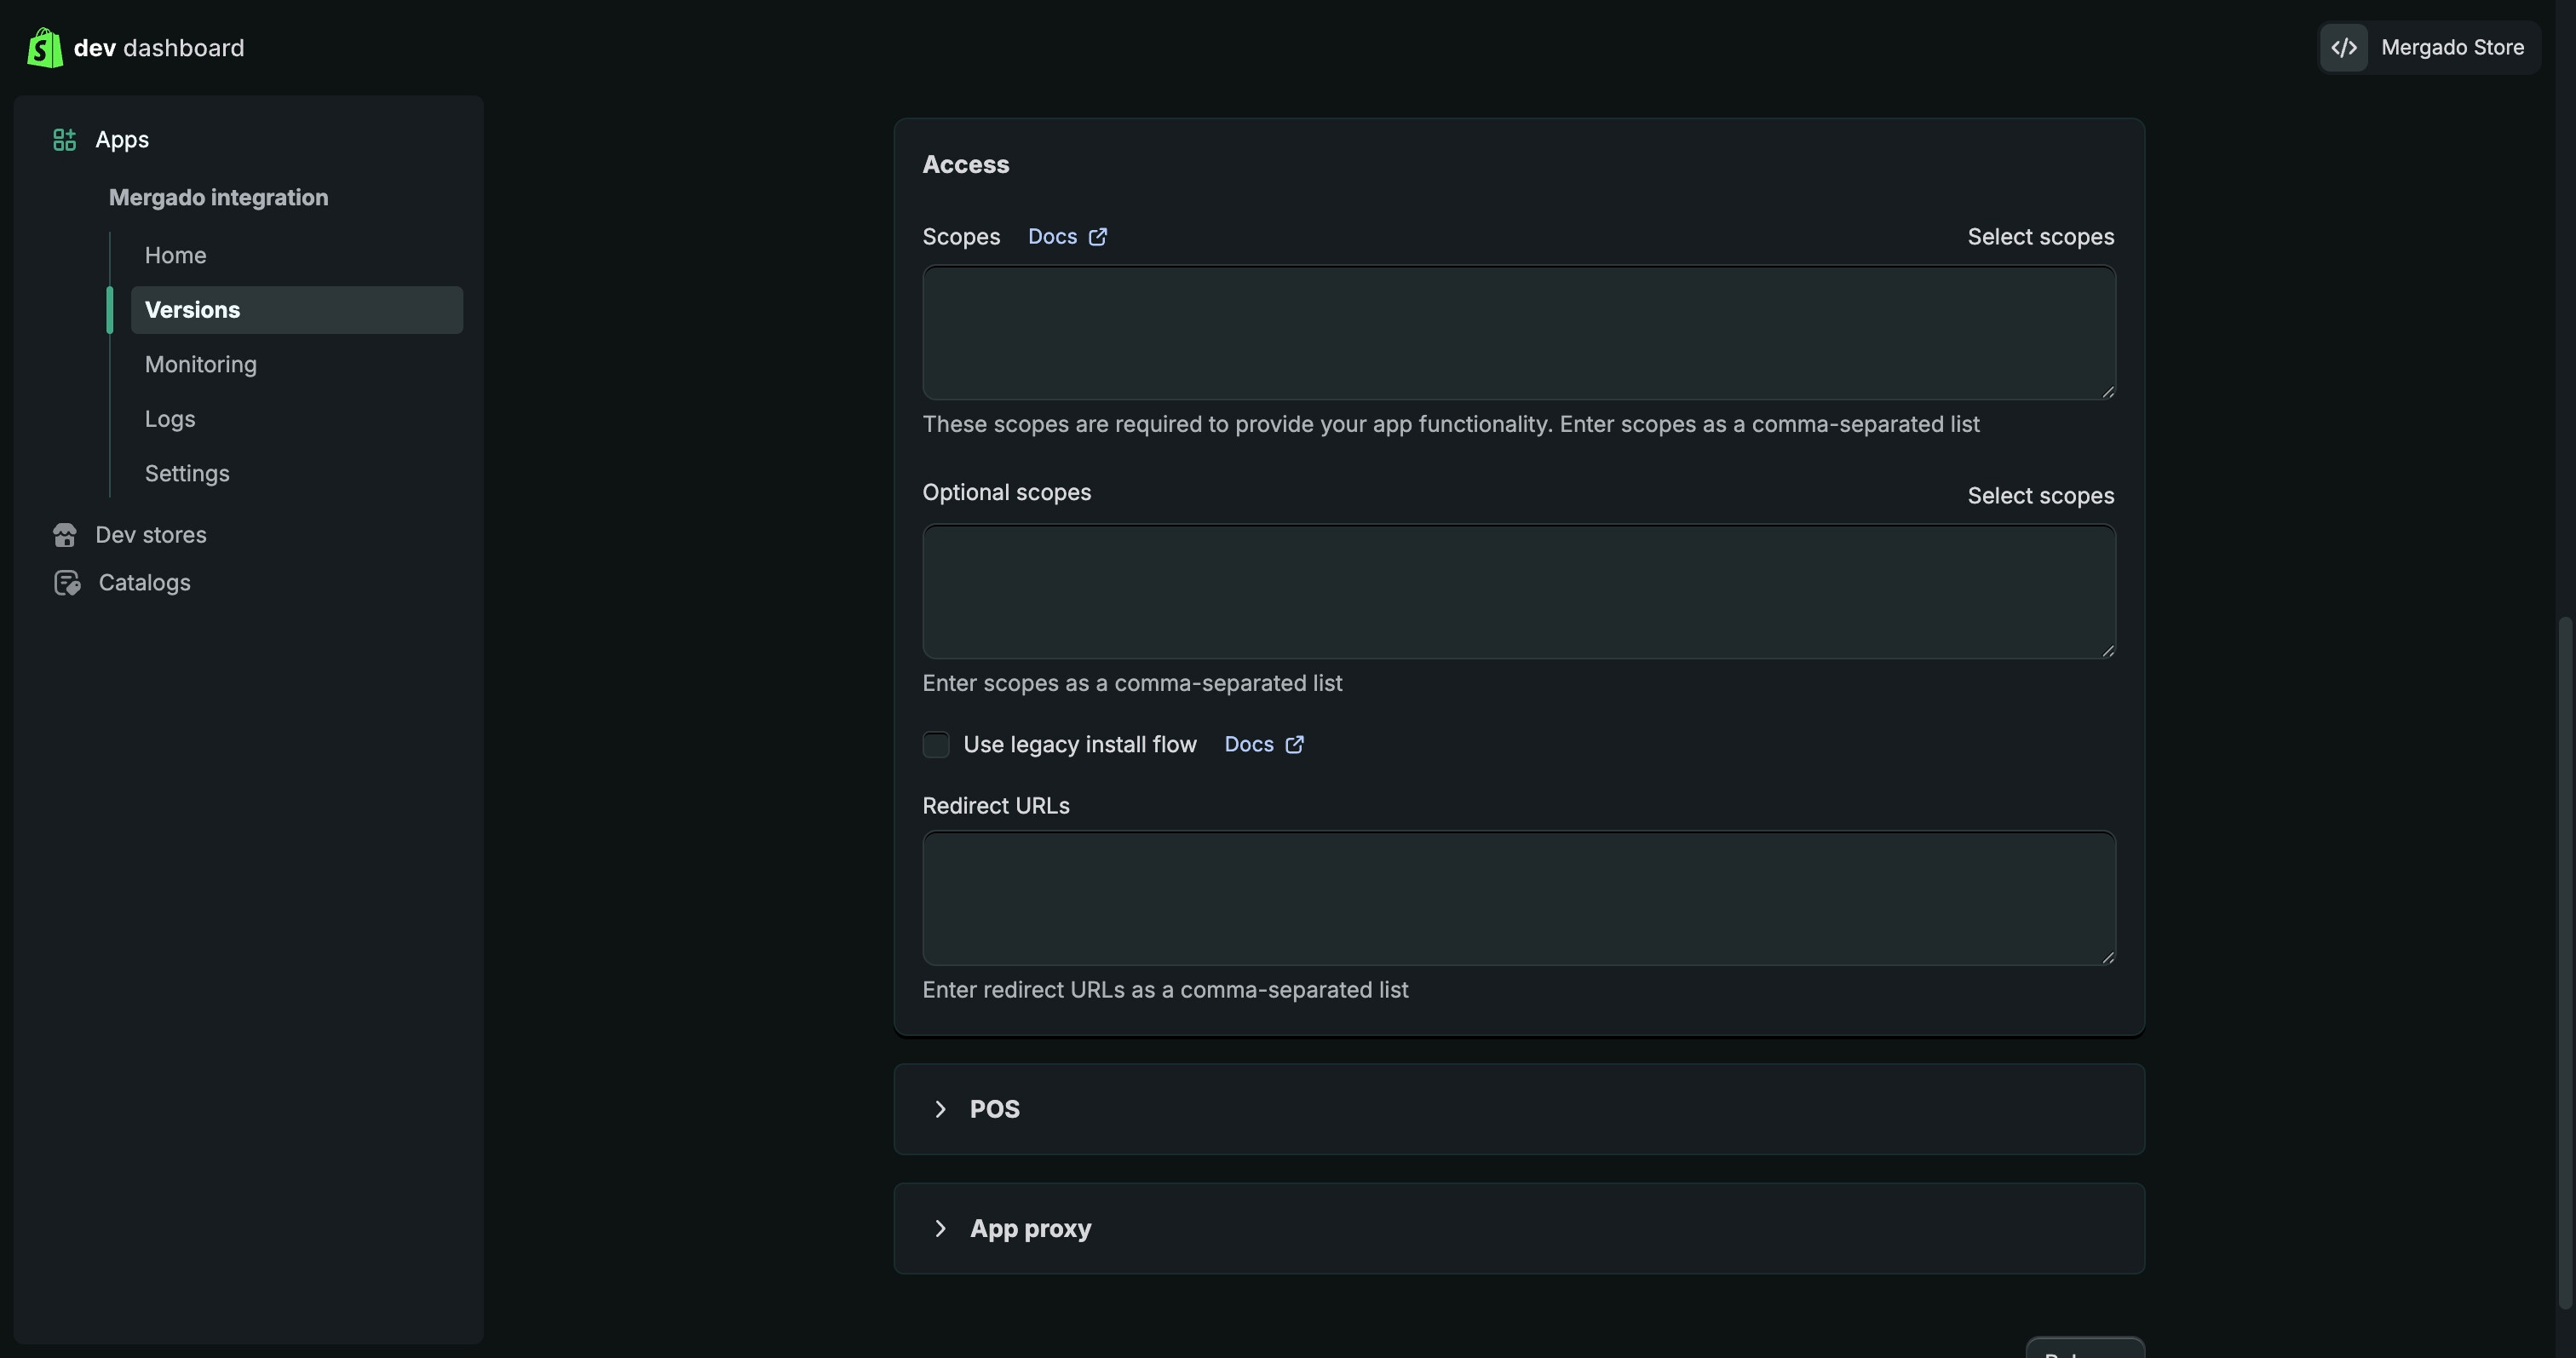
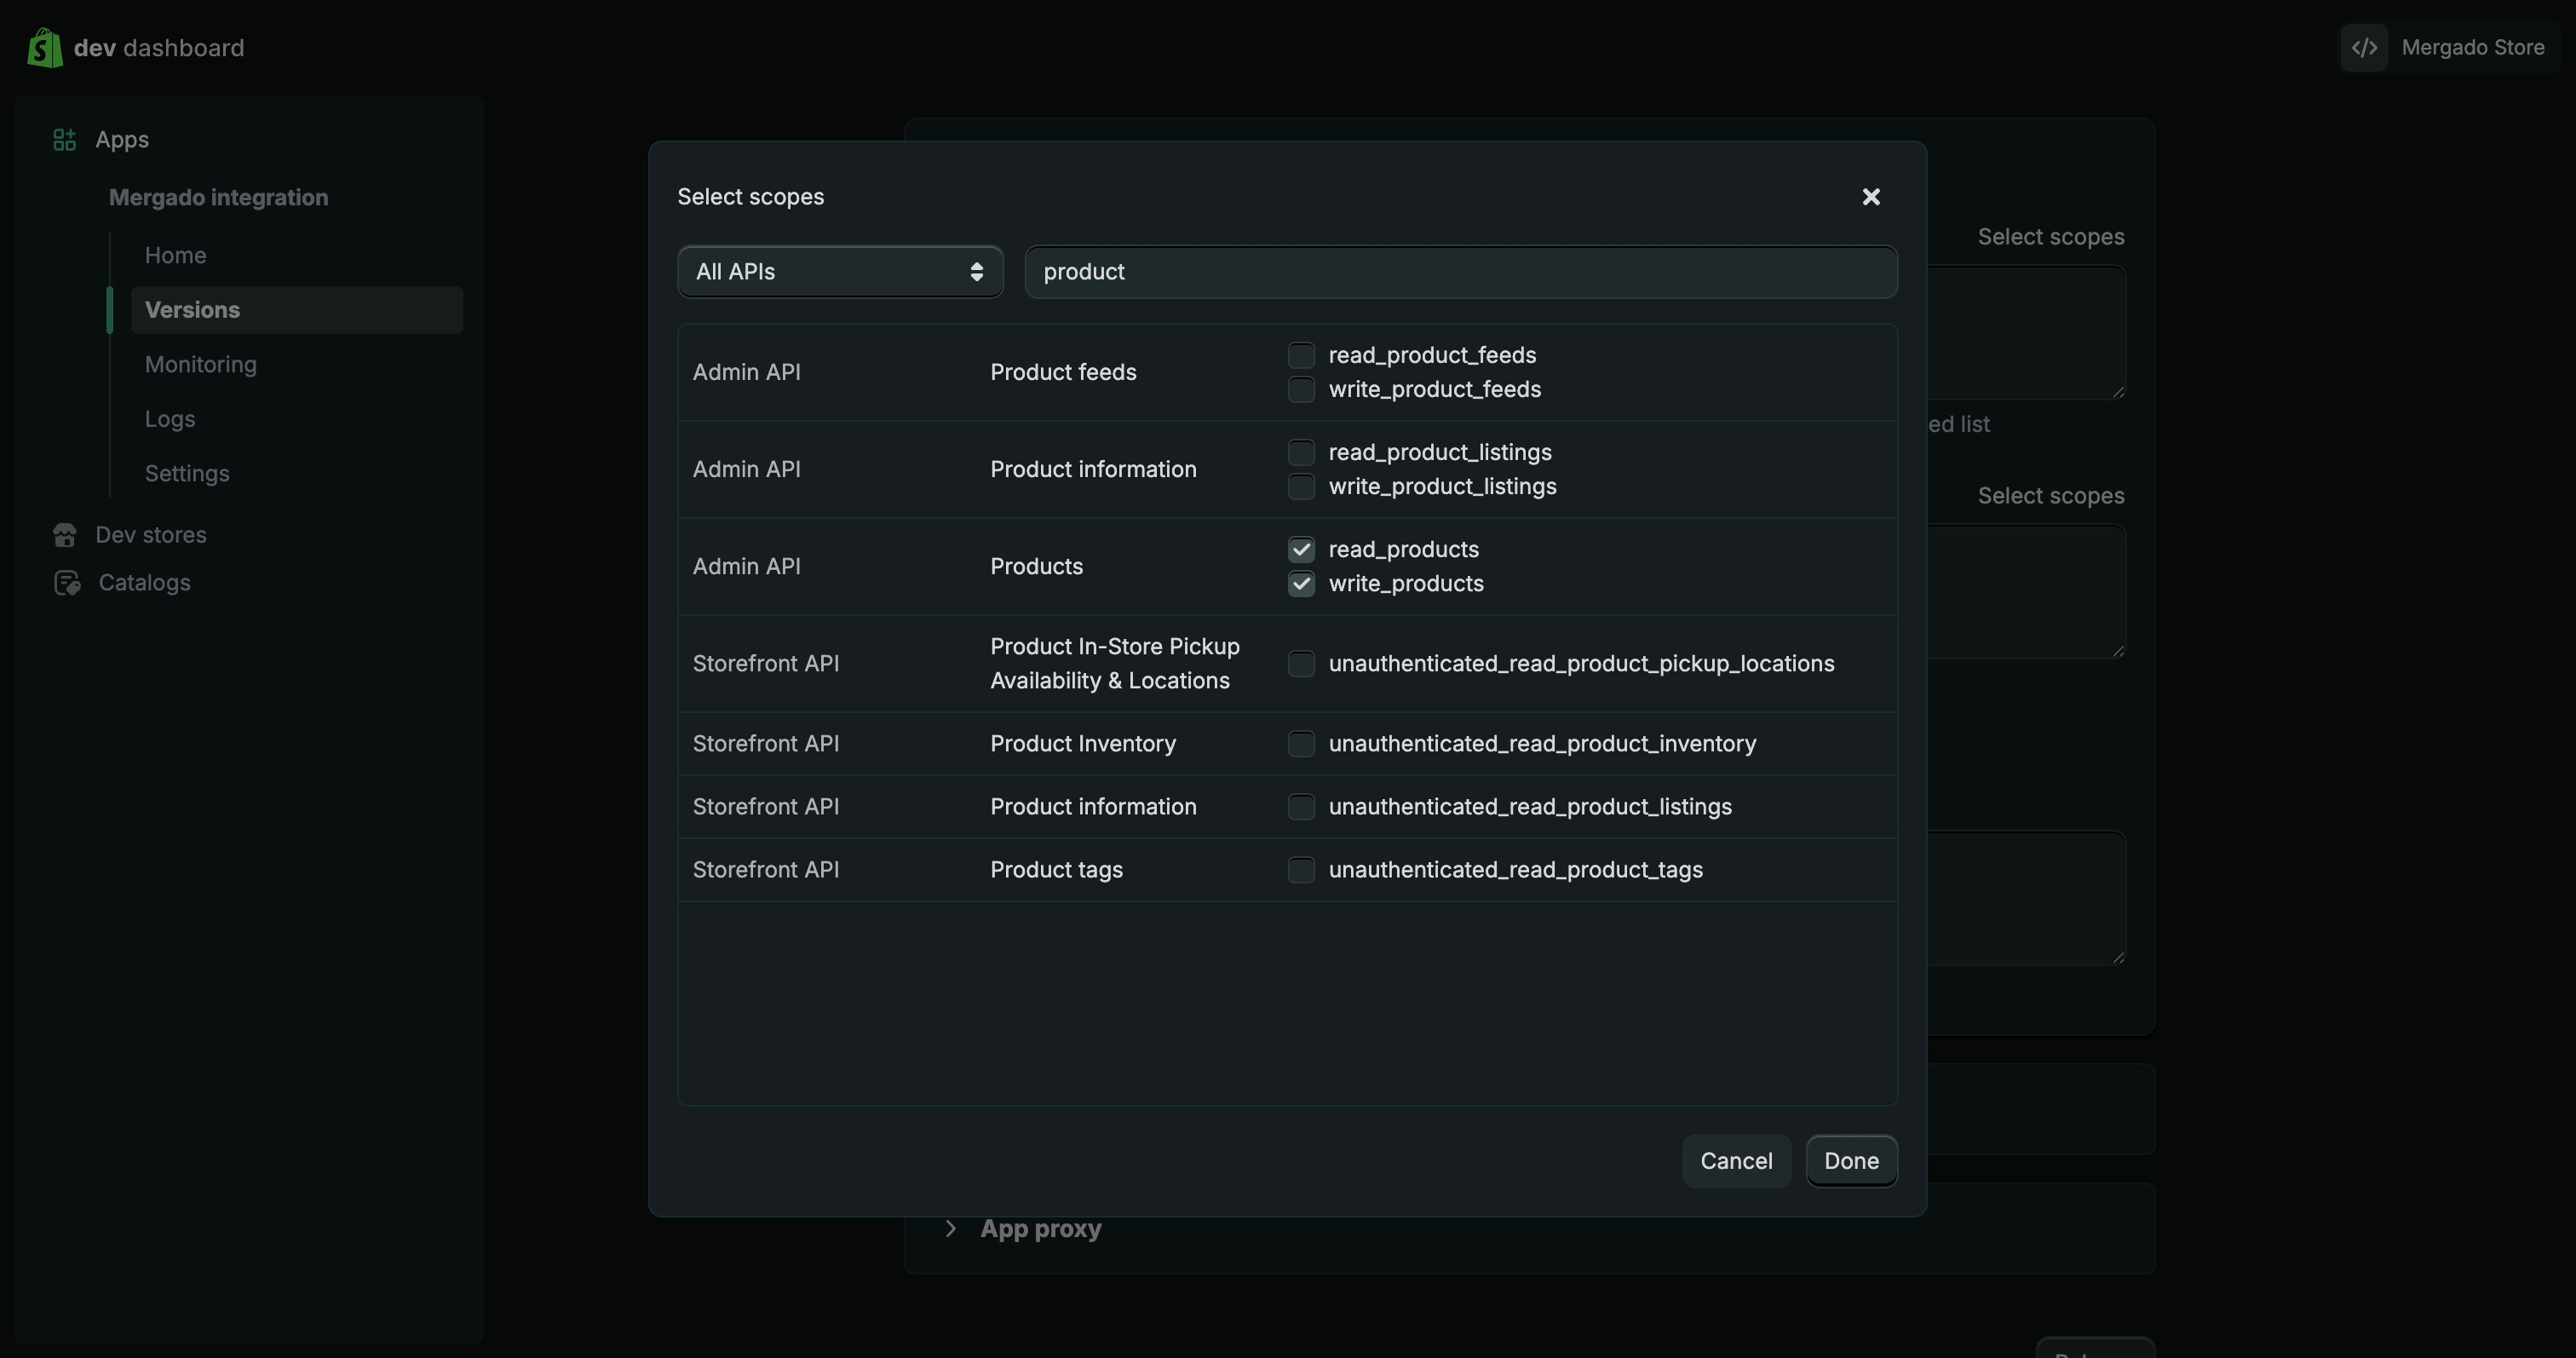
- In the Access section, click Select scopes
- In the modal window, filter and select the following scopes:
read_productswrite_productsread_marketswrite_marketsread_metaobjects
- Click Done
These scopes are required for Mergado to import product data and market‑specific information.
3.3 Release the version
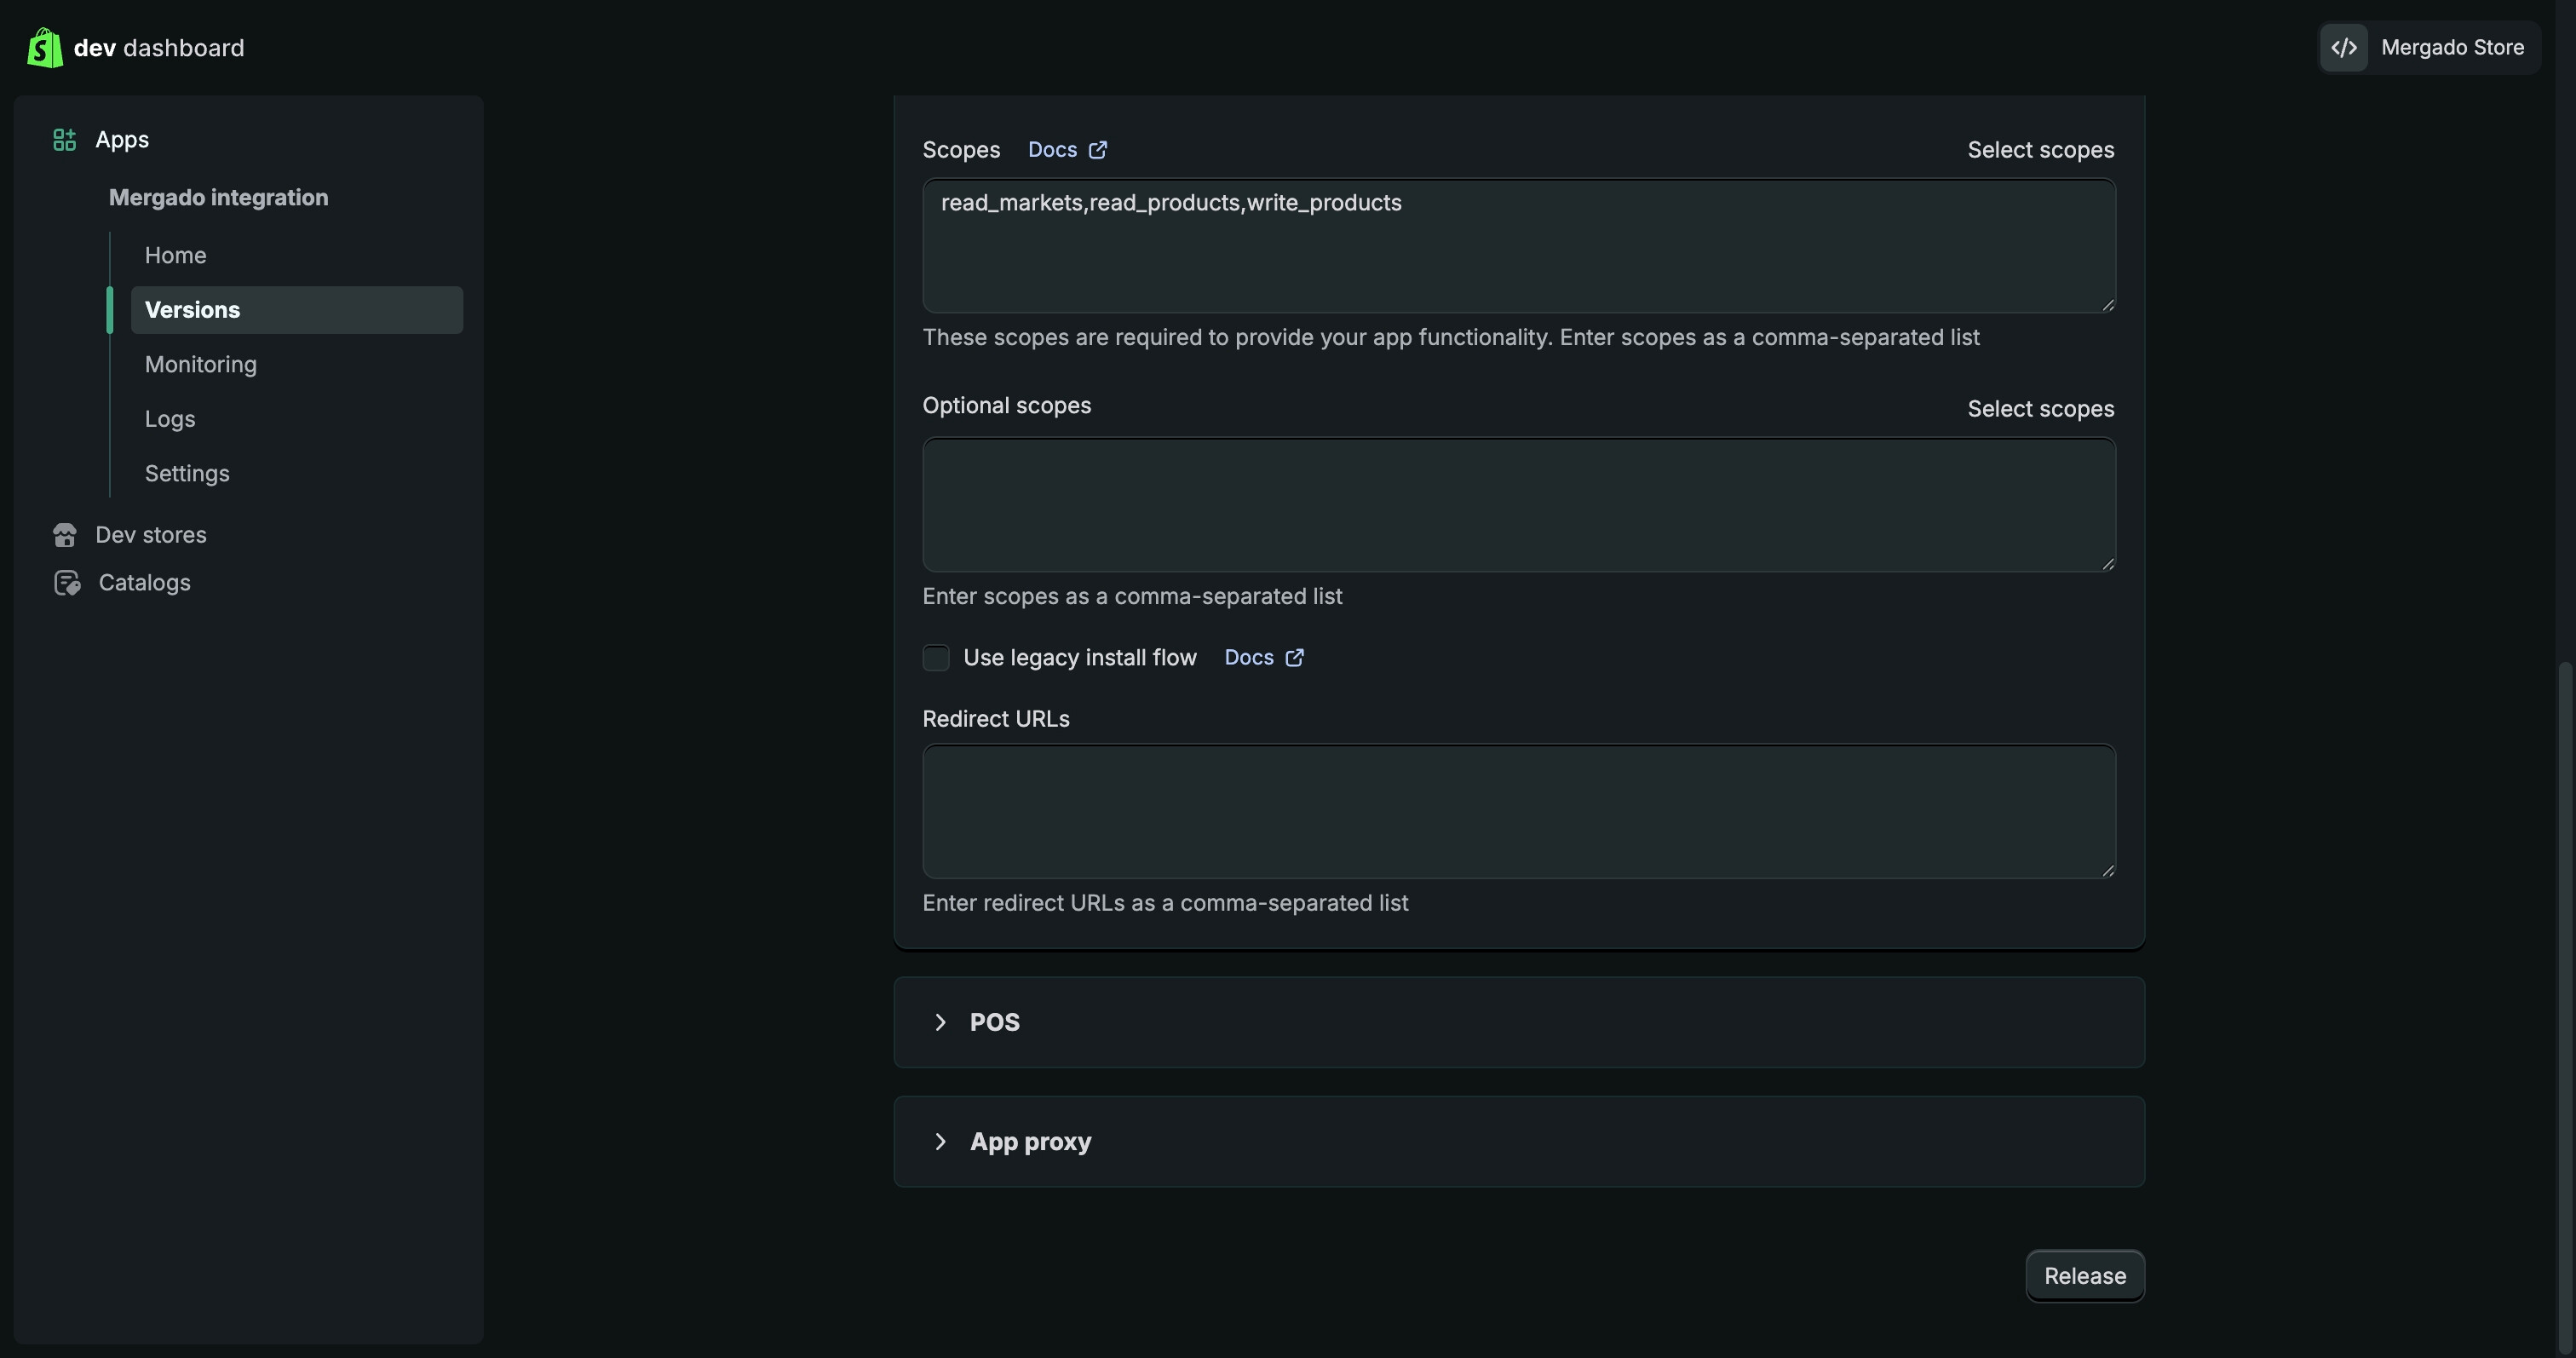
- Scroll down
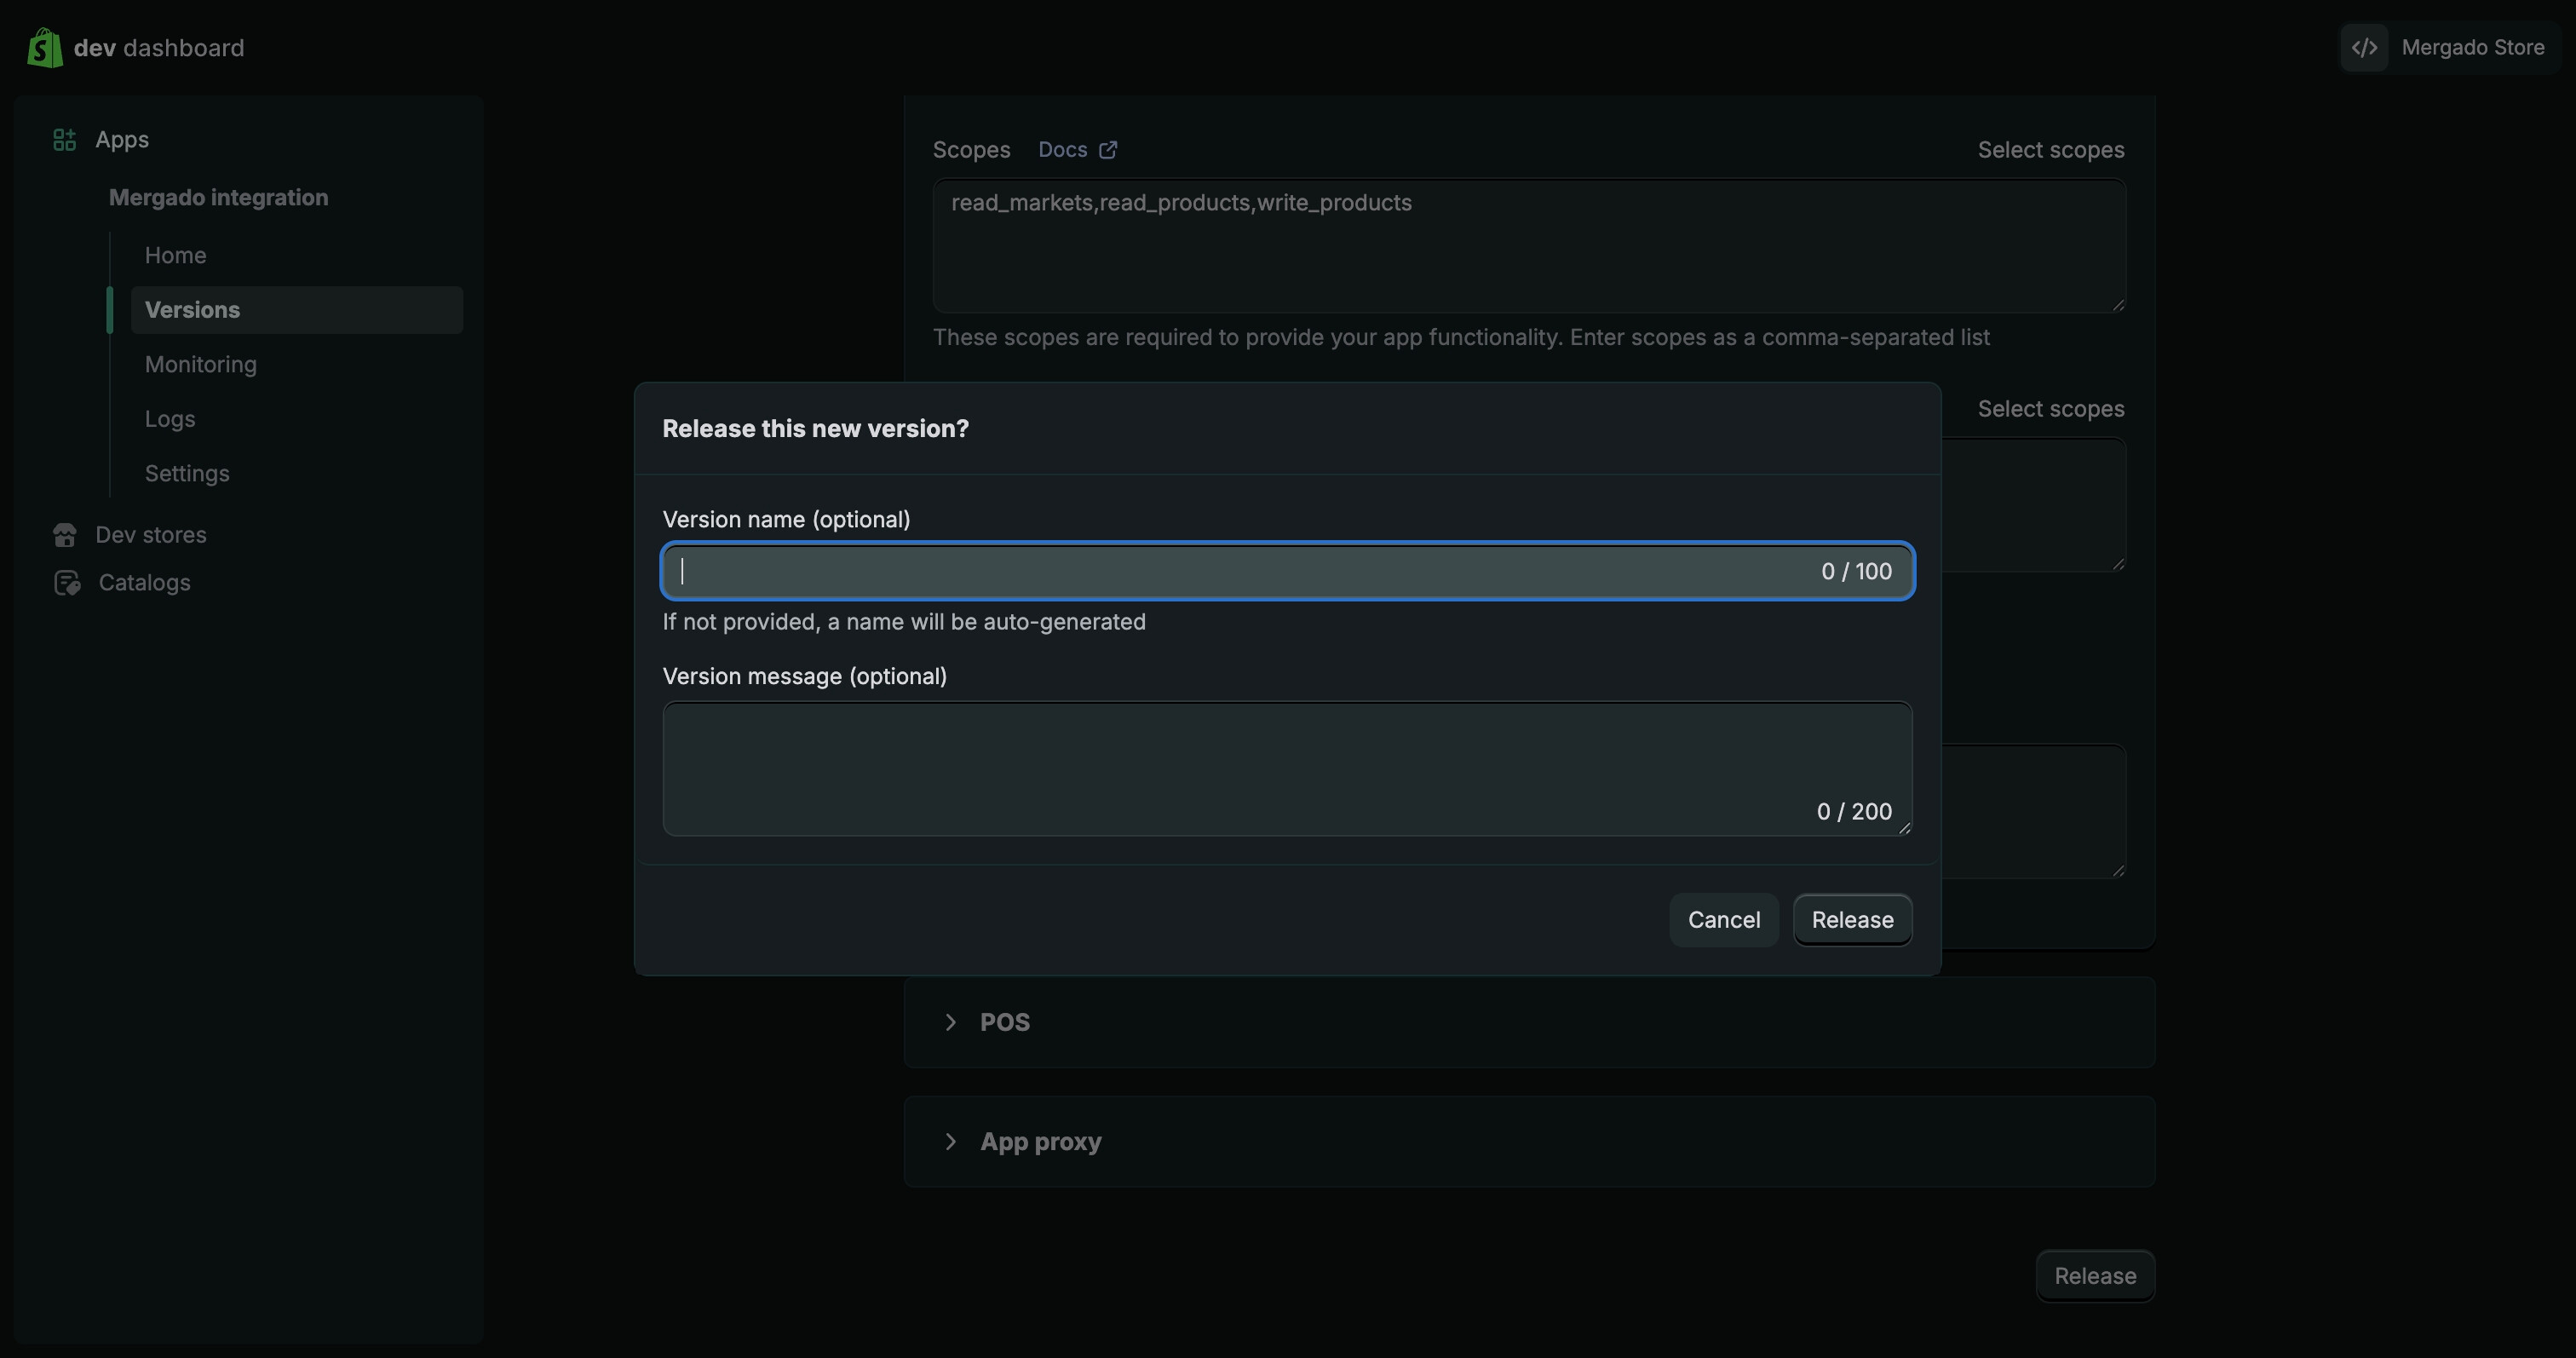
- Click Release
- In the confirmation modal:
- Version name is optional (can be left empty)
- Click Release
The app version is now released and can be installed on a store.
Step 4: Install the app
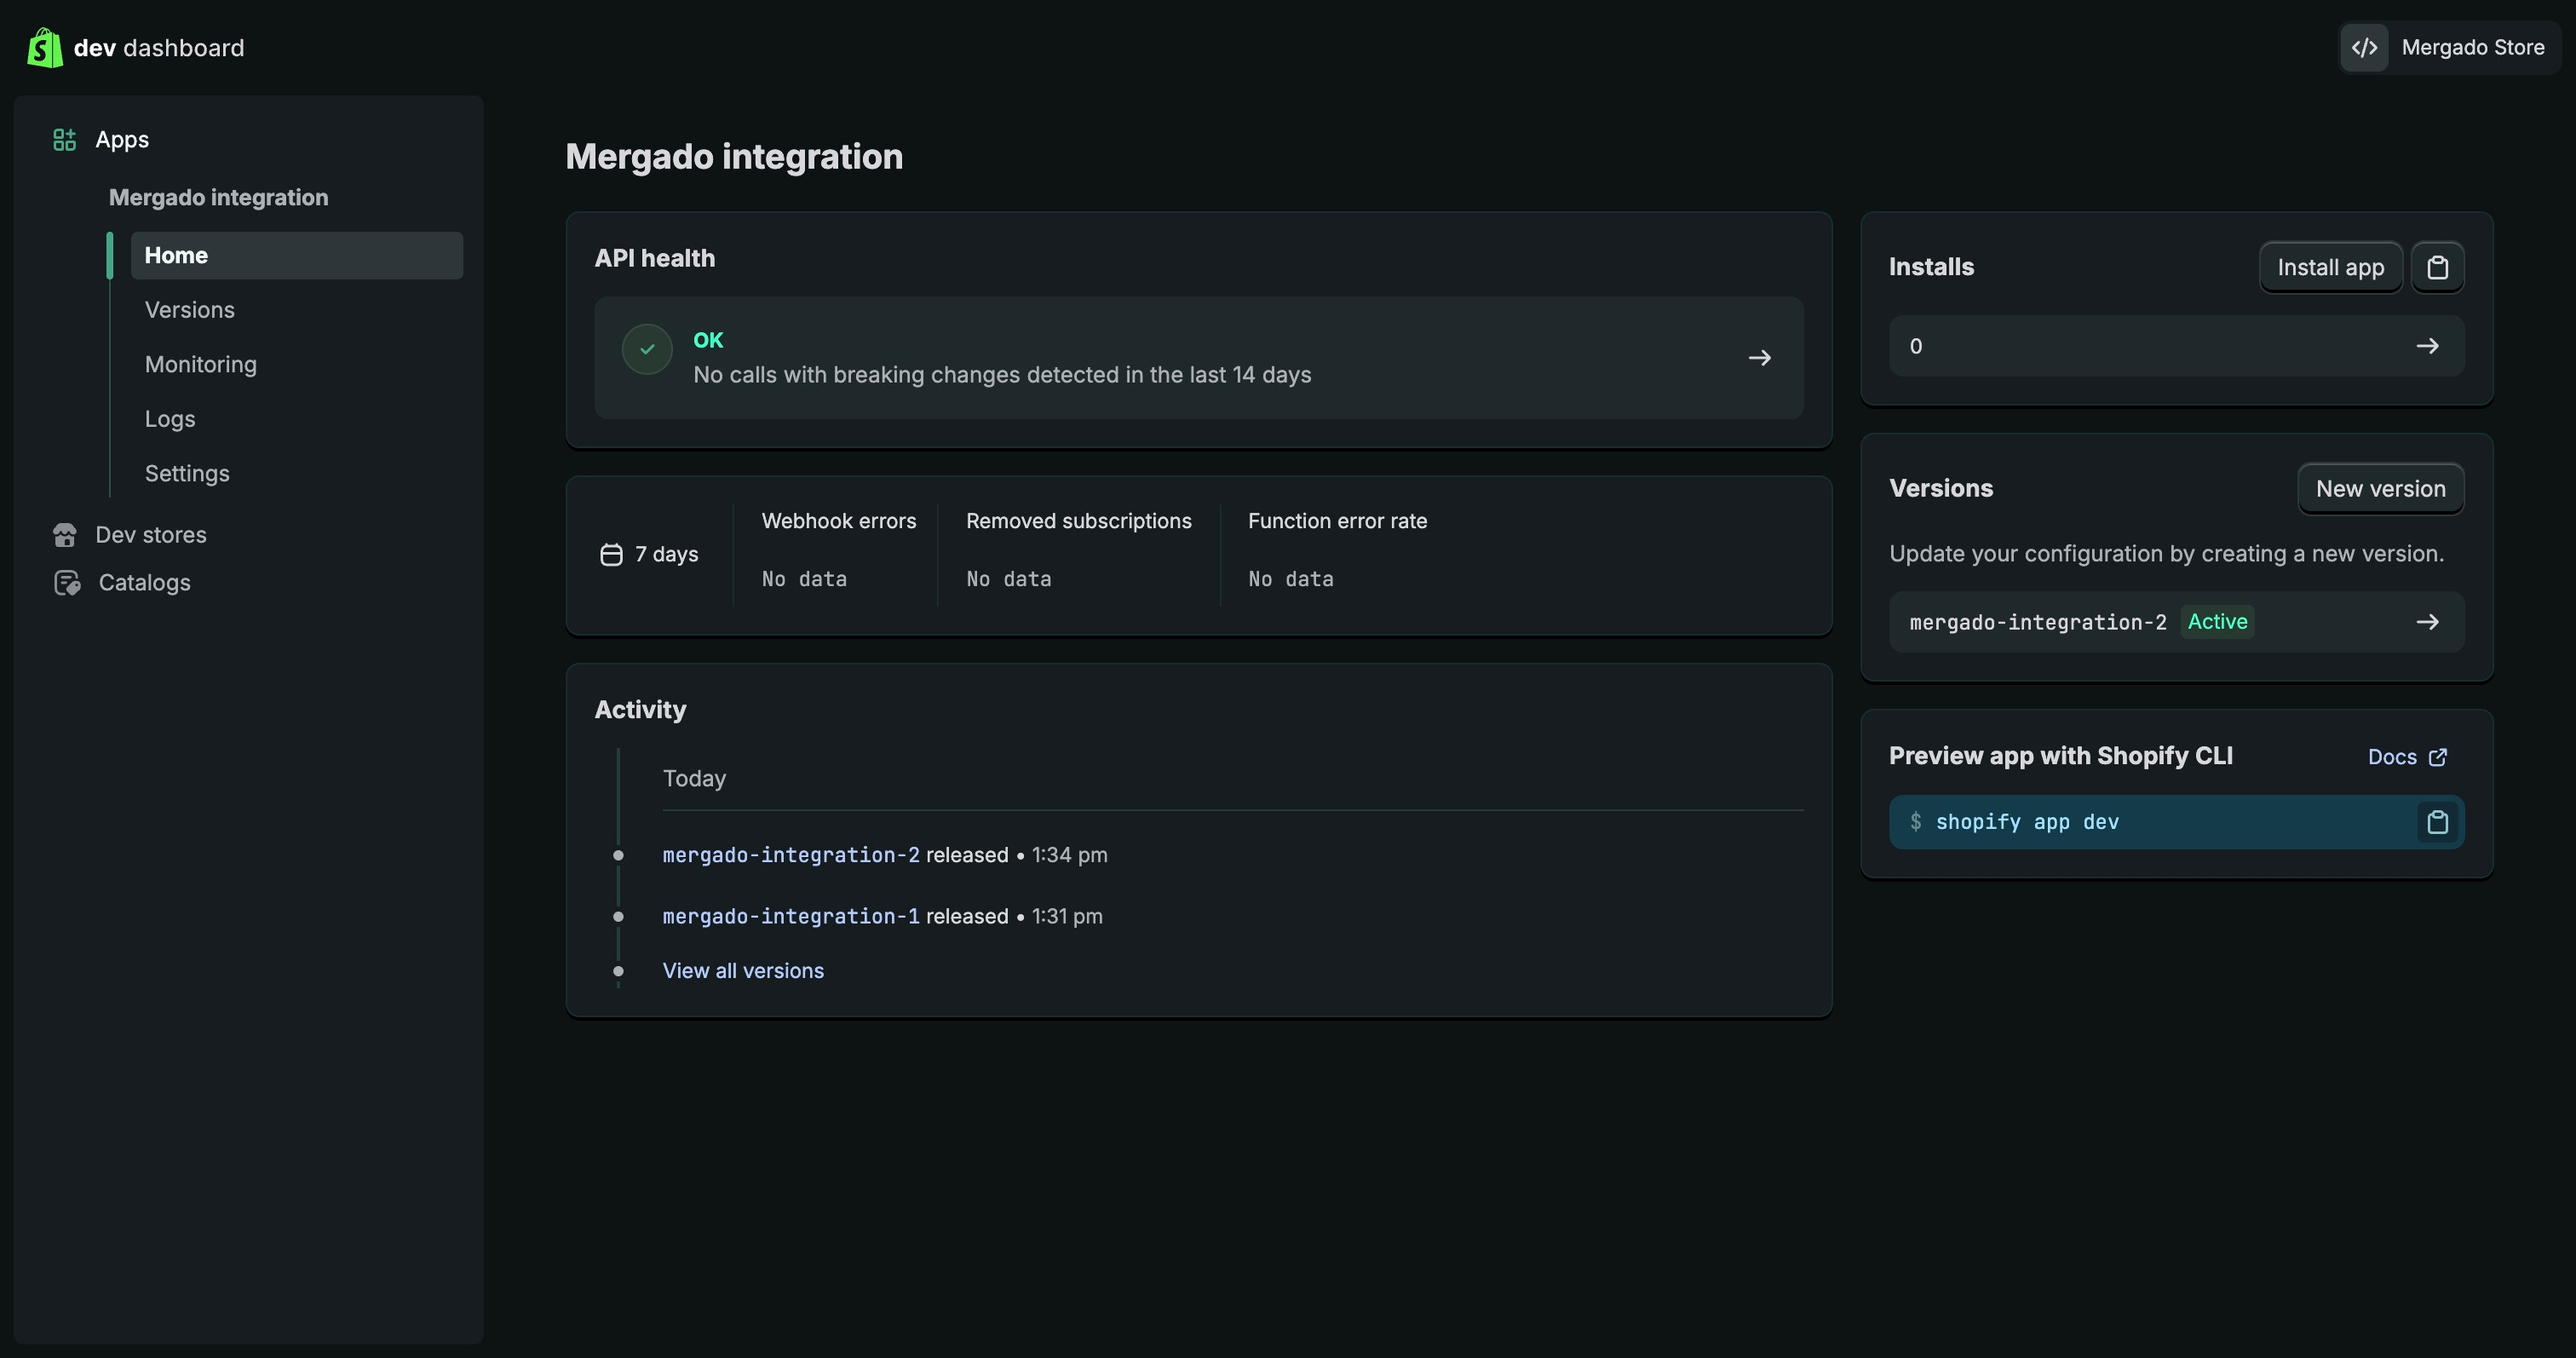
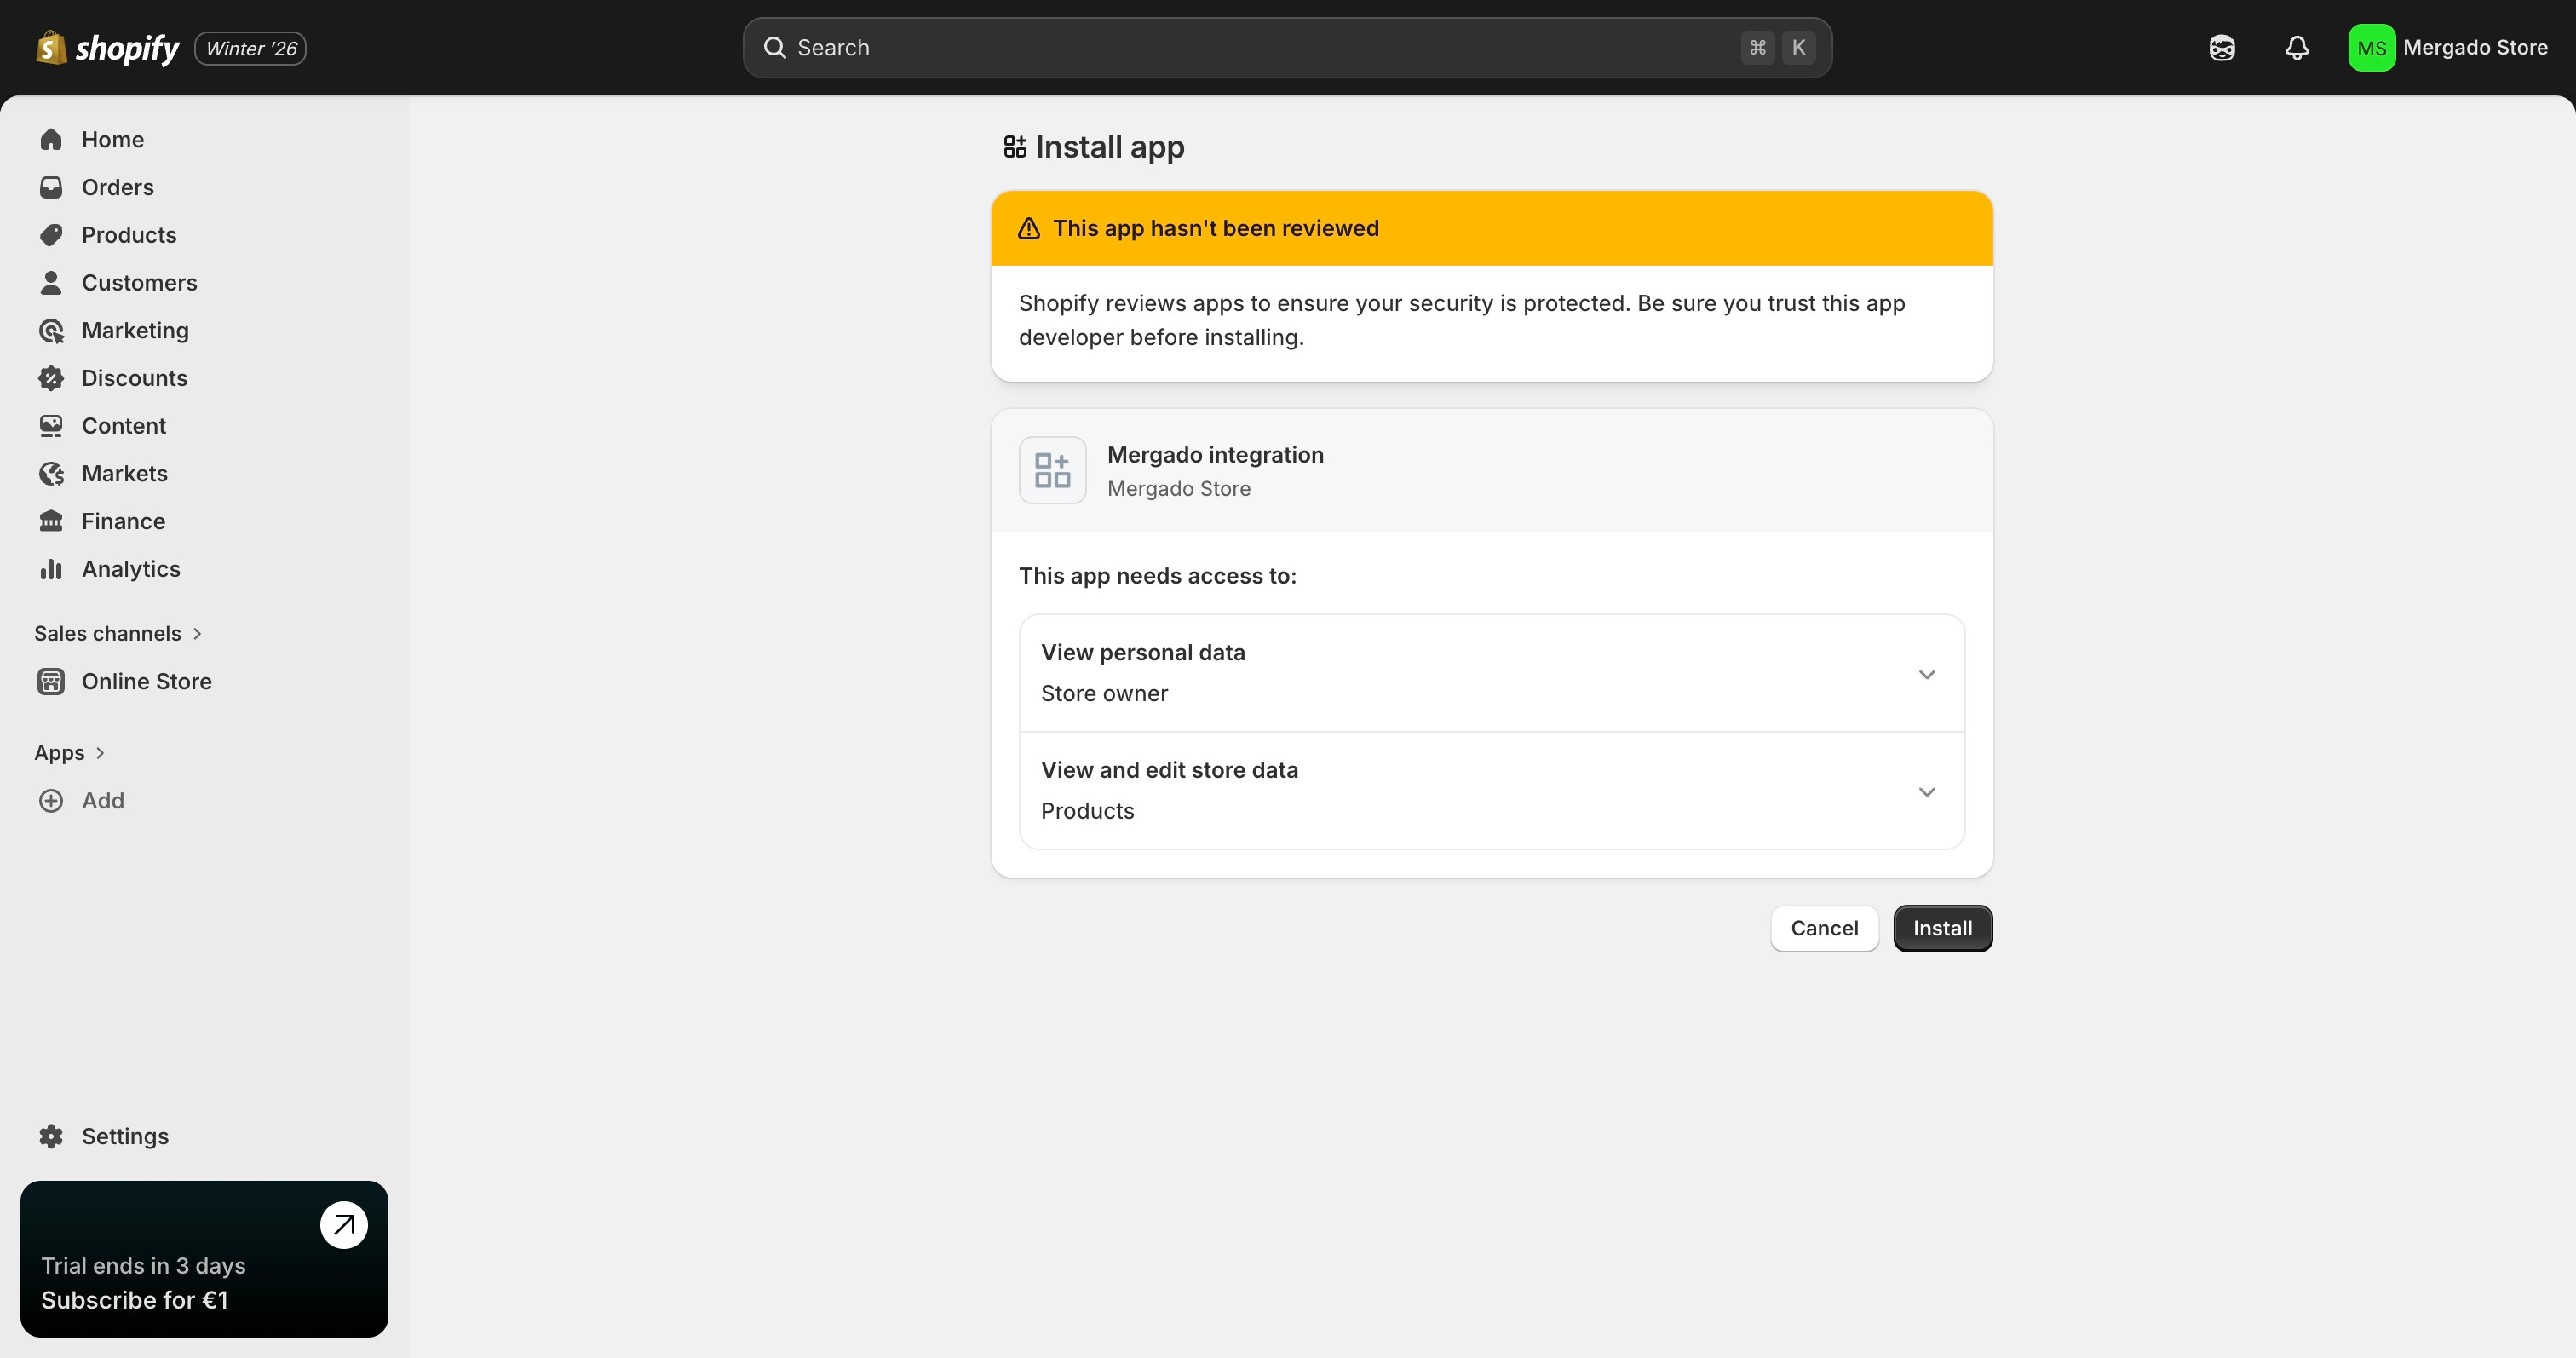
- Open Home
- Click Install app
- Select the store
- Confirm installation in Shopify admin
Step 5: Get the API credentials (Client ID and token)
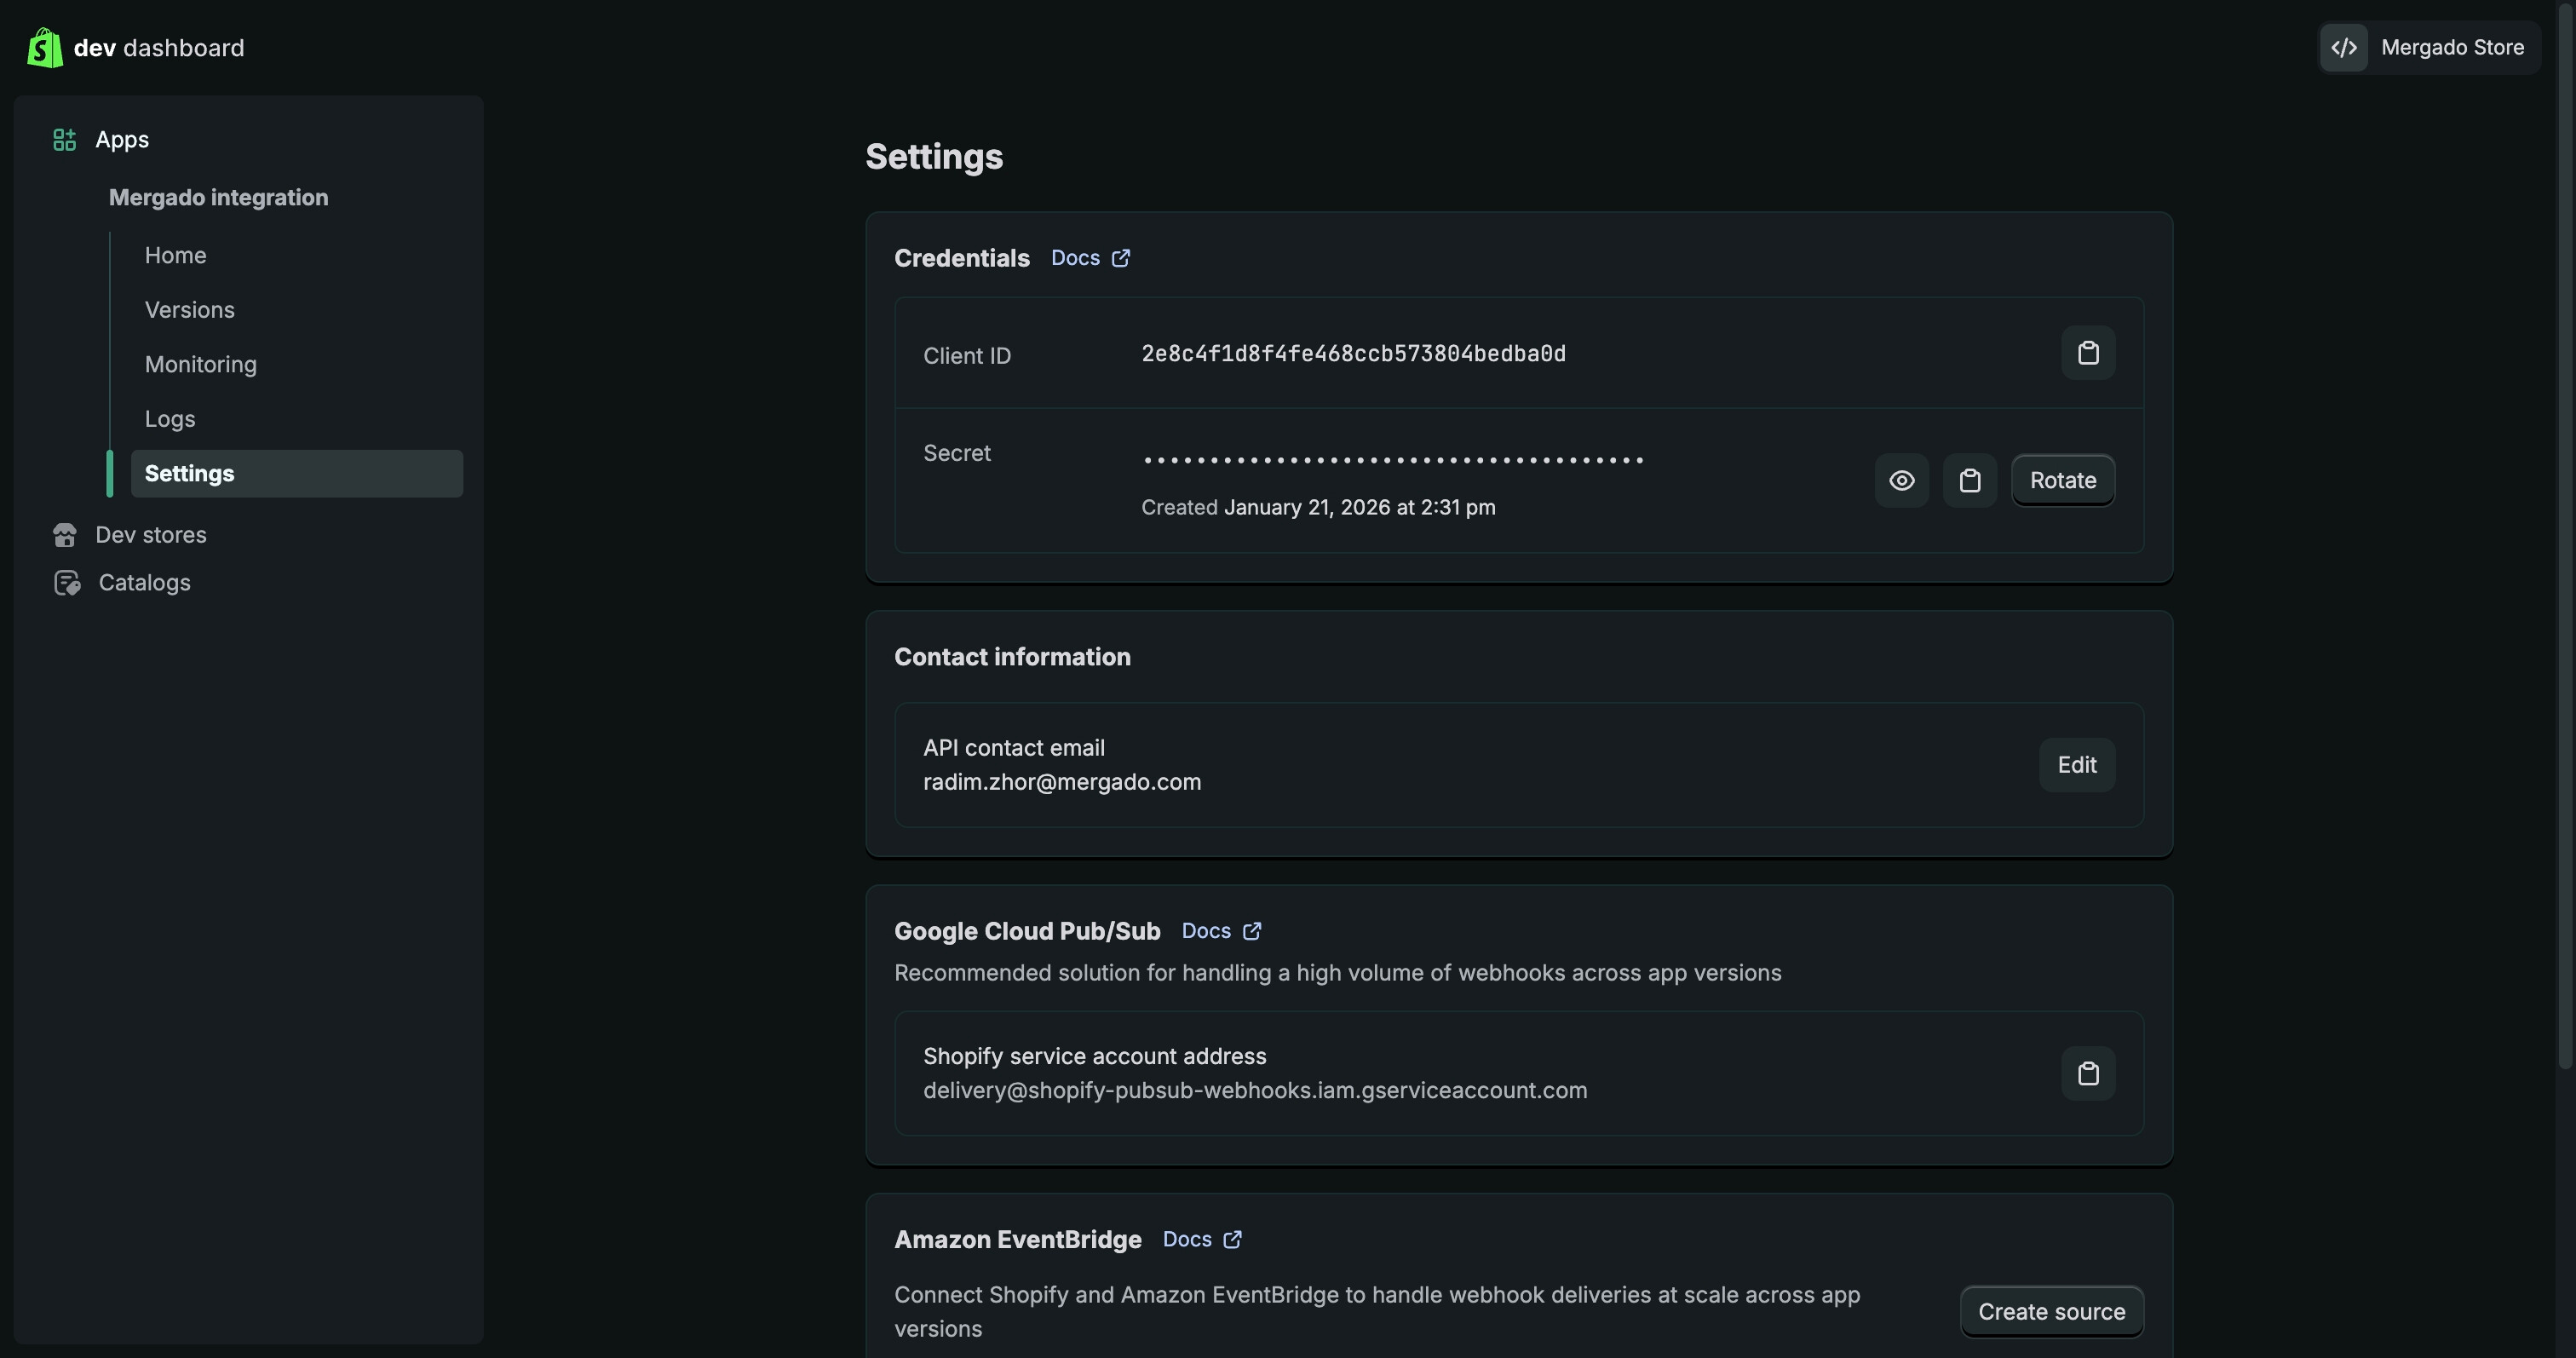
After installation, you need to obtain two values from the Developer Dashboard:
- Client ID
- Client Secret (Secret)
Steps:
- Switch back to the Shopify Developer Dashboard
- Open your app
- Go to Settings
- In the Credentials section:
- copy the Client ID (located above the Secret field)
- copy the Secret
The Client ID identifies the app, while the Secret acts as the API access token. Both values are required for a successful Shopify–Mergado integration.
Step 6: Get the store URL
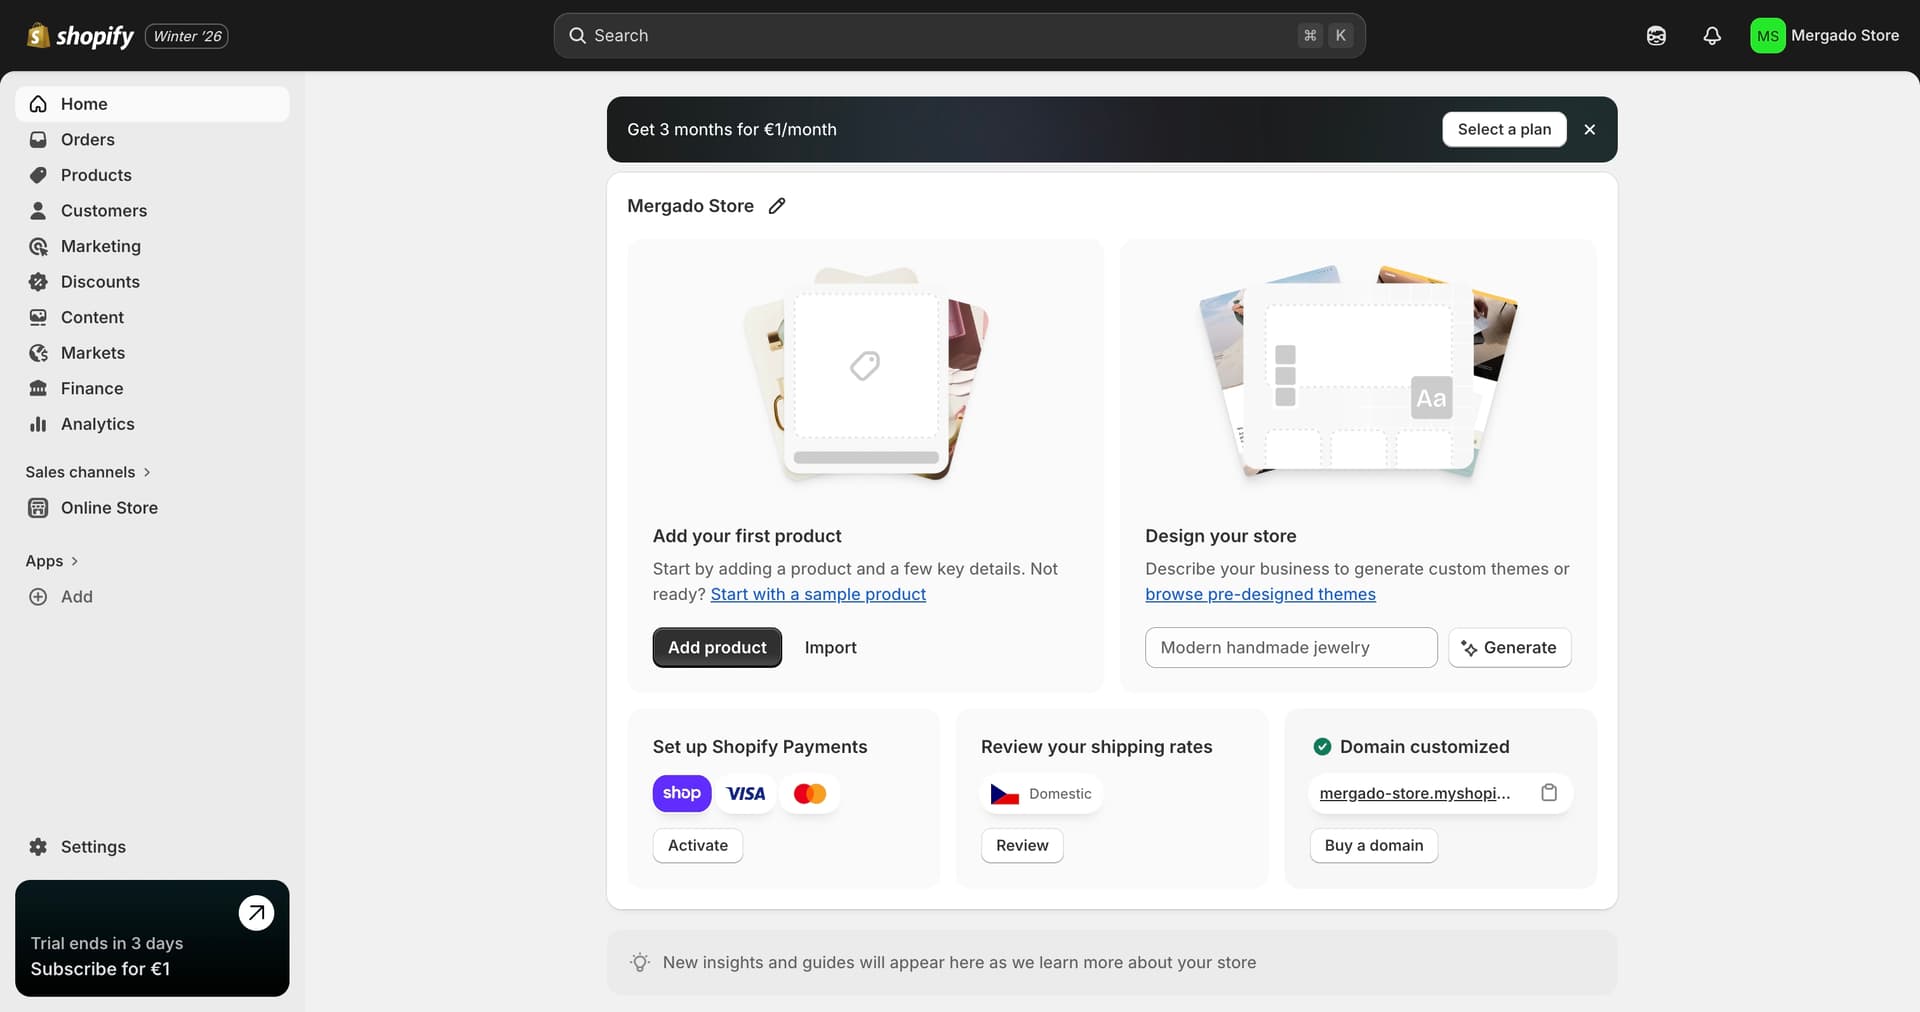
- Open Shopify admin → Home → Domains
- Copy the
*.myshopify.comURL
Step 7: Connect Shopify to Mergado
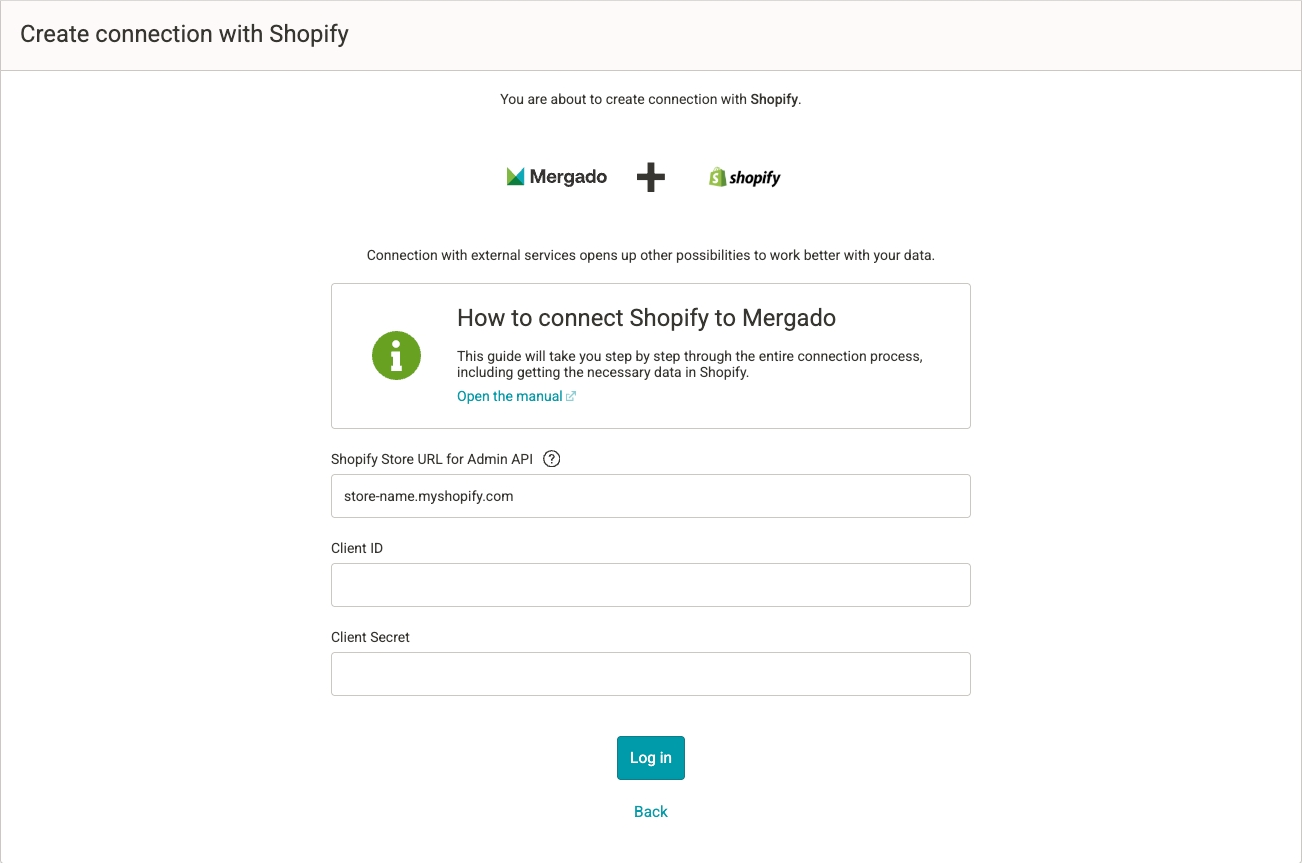
- Open Mergado
- Create a new project
- Select Shopify as the data source
- Enter all three values :
- Shopify URL → paste the store URL
- Client ID → paste the copied Client ID from the Shopify Developer Dashboard
- Client Secret → paste the copied Secret
- Click Log in
Mergado will now import:
- Products and variants
- Market‑specific data
- Prices and availability
FAQ – Frequently asked questions
After selecting a Market, the language does not load. Why?
The most common cause is incorrect configuration in the Markets section of the Shopify admin.
If Domain / language exists only in the Inherited section and has not been explicitly added to the Customized section, Shopify will not return data for that market via the API. As a result, the language will not load in Mergado after selecting the Market.
Solution:
- Open Shopify admin → Markets
- Open the specific market
- In the Domain / language row, click the + icon
- Select the required domain and language
- Click Done and then Save
- Verify that the item now appears in the Customized section
Mergado does not load the correct value of some metafields. Why?
If you see the metafield name (key), but the value is displayed as an ID (for example ["gid://shopify/Metaobject/94942036012"] ) or you receive a “Missing required scope” message, the app is missing permission to read metaobjects.
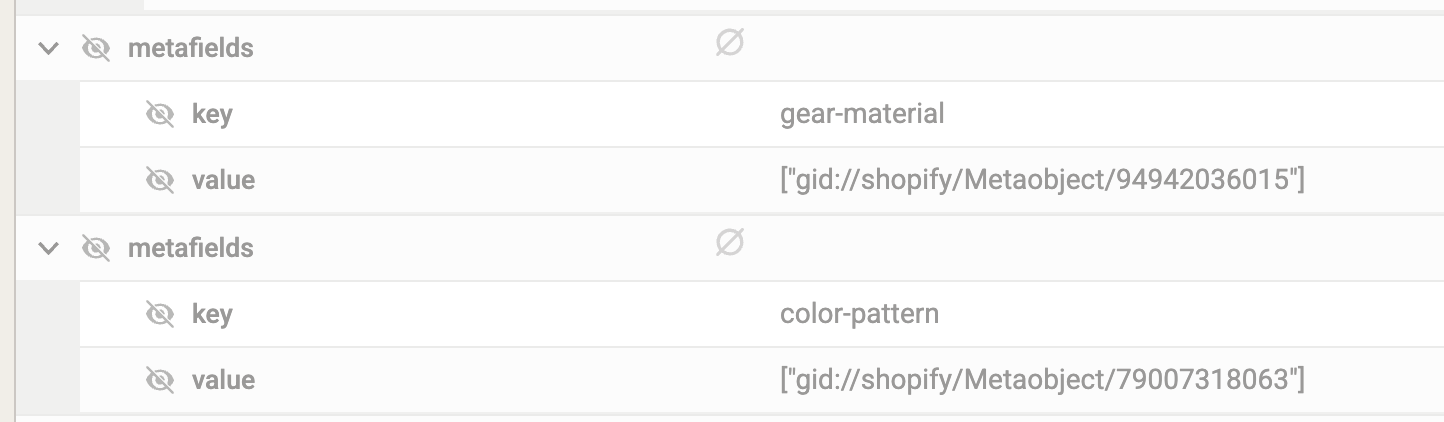
You need to add an additional scope:
read_metaobjects
How to add the scope
- Go to the Shopify Developer Dashboard
- Open the app created for the Mergado integration
- In the left menu, go to Versions
- Click New version
- In the Scopes section, add the
read_metaobjectsscope - Complete the new version by clicking Release
After releasing the new version, the connection must be reauthorized.
Reauthorize the connection in Mergado
- Open the Mergado Keychain extension
- Remove the existing connection
- Enter the authorization details again:
- Shopify URL
- Client ID
- Secret
- Click Log in to reconnect